Tooth fragment reattachment
On
Tooth fragment reattachment using acrylic/silicone guide
Fragment reattachment success depends mainly upon the extent of the fracture, the condition of the fragment and its adaptation to the remnant. The case simulated in this article presents a fracture involving enamel and dentin, with the fragment in excellent condition.


⛔️ Note that they are clearly confined to the remnant not extending to the fracture line which will later be the bonding interface between the tooth and the fragment.
Under normal occlusal conditions, the existence of discrepancies between the contacts observed before and after bonding suggests that the fragment was bonded in a suitable position. Fragment reattachment is probably the one that most of its success depends upon adhesion. First of all the operative field has to be properly isolated using a rubber dam.
Under normal occlusal conditions, the existence of discrepancies between the contacts observed before and after bonding suggests that the fragment was bonded in a suitable position. Fragment reattachment is probably the one that most of its success depends upon adhesion. First of all the operative field has to be properly isolated using a rubber dam.
⛔️ The most critical step of bonding a tooth fragment is undoubtedly the correct placement at the moment the adhesive and the composite resin is light-cured. In order to avoid any mistakes, an acrylic or a silicone guide is prepared. With reference to the adjacent teeth to ensure optimal positioning of the fragment.
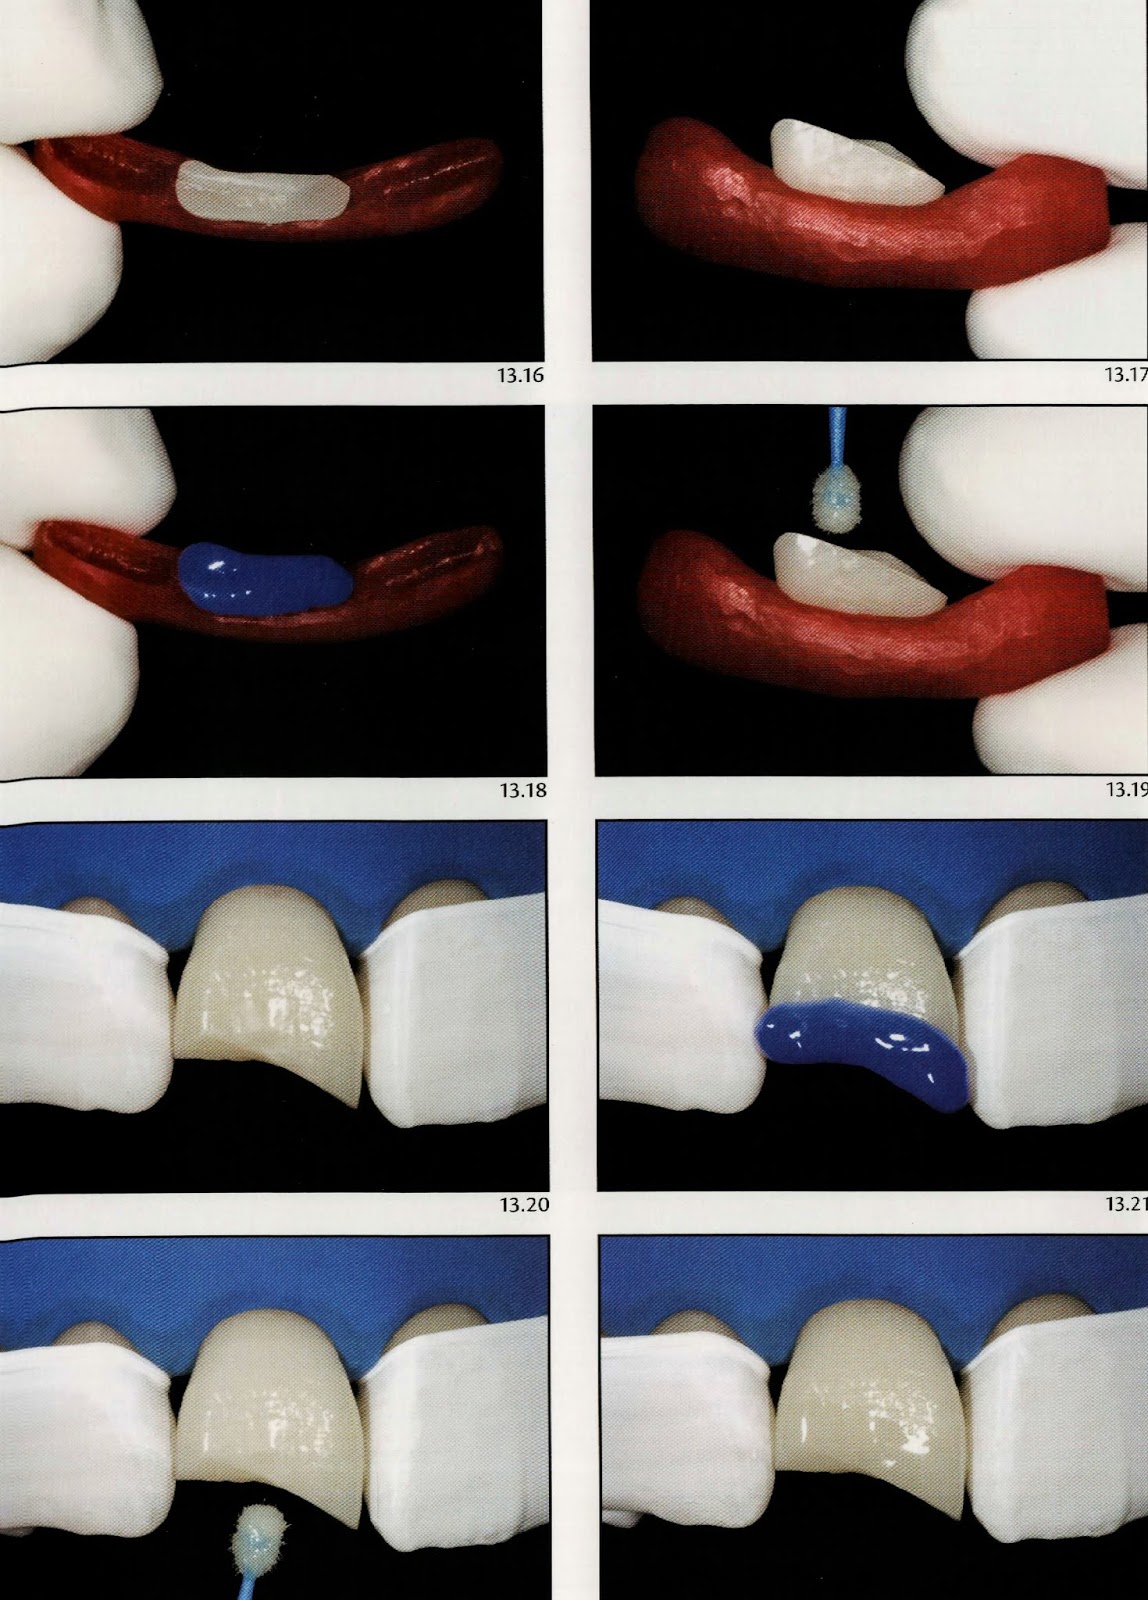
The first step in making the guide is carried out through the placement of the fragment into position and attaching it temporarily with a composite resin pellet placed at the tooth remnant-fragment in the interface and then proceed with light curing.
The next step is the isolation of the teeth adjacent to the fractured tooth with a water-soluble lubricant. Next, a bead of acrylic resin in the plastic phase is led against the incisal surfaces of the three teeth involving part of the buccal and palatal surfaces.
⛔️ It is important for the acrylic resin not to exceed the fracture line so as to allow for adequate removal of the excess composite while performing the bonding of the fragment.
After the complete polymerization of the acrylic, the composite pellet that held in place the fragment to the tooth remnant is removed and the acrylic guide is displaced towards the incisal aspect.
⛔️ Notice that the acrylic guide easily detaches from lubricated teeth, while maintaining the fragment that had not been isolated attached. Thus the guide is an important reference for the positioning of the bond and also facilitates the manipulation of the fragment while performing the adhesive procedures since its handling is generally difficult due to their tiny size.

📝 During a fragment reattachment ;
1️⃣ The bonding procedures are performed separately. Firstly on the fragment and then on the tooth. Acid etching is performed on the entire surface to be bonded and extends approximately 1 to 2 mm towards the proximal, buccal and palatal surfaces. After 15 seconds the etchant is rinsed and the excess moisture is removed with air jets and cotton pellets, respecting the enamel and dentin substrates. The adhesive system is applied without light curing. At this point, the fragment is ready for bonding although the adhesive procedures have not yet been performed on the remnant.
⛔️ it is important that the fragment remains shielded from light to prevent premature curing of the adhesive layer.
2️⃣ In the tooth remnant, the procedures begin with the protection of the adjacent teeth with teflon tapes from the action of phosphoric acid and the adhesive system. The acid etching and adhesive system follow the same protocol as used on the fragment, and again
⛔️ the adhesive is not light-cured as this moment.
Attention please ‼️ if the adhesive layer was light-cured on both the fragment and the tooth, the thickness of the adhesive film could prevent the correct fit between them during bonding.
Attention please ‼️ if the adhesive layer was light-cured on both the fragment and the tooth, the thickness of the adhesive film could prevent the correct fit between them during bonding.
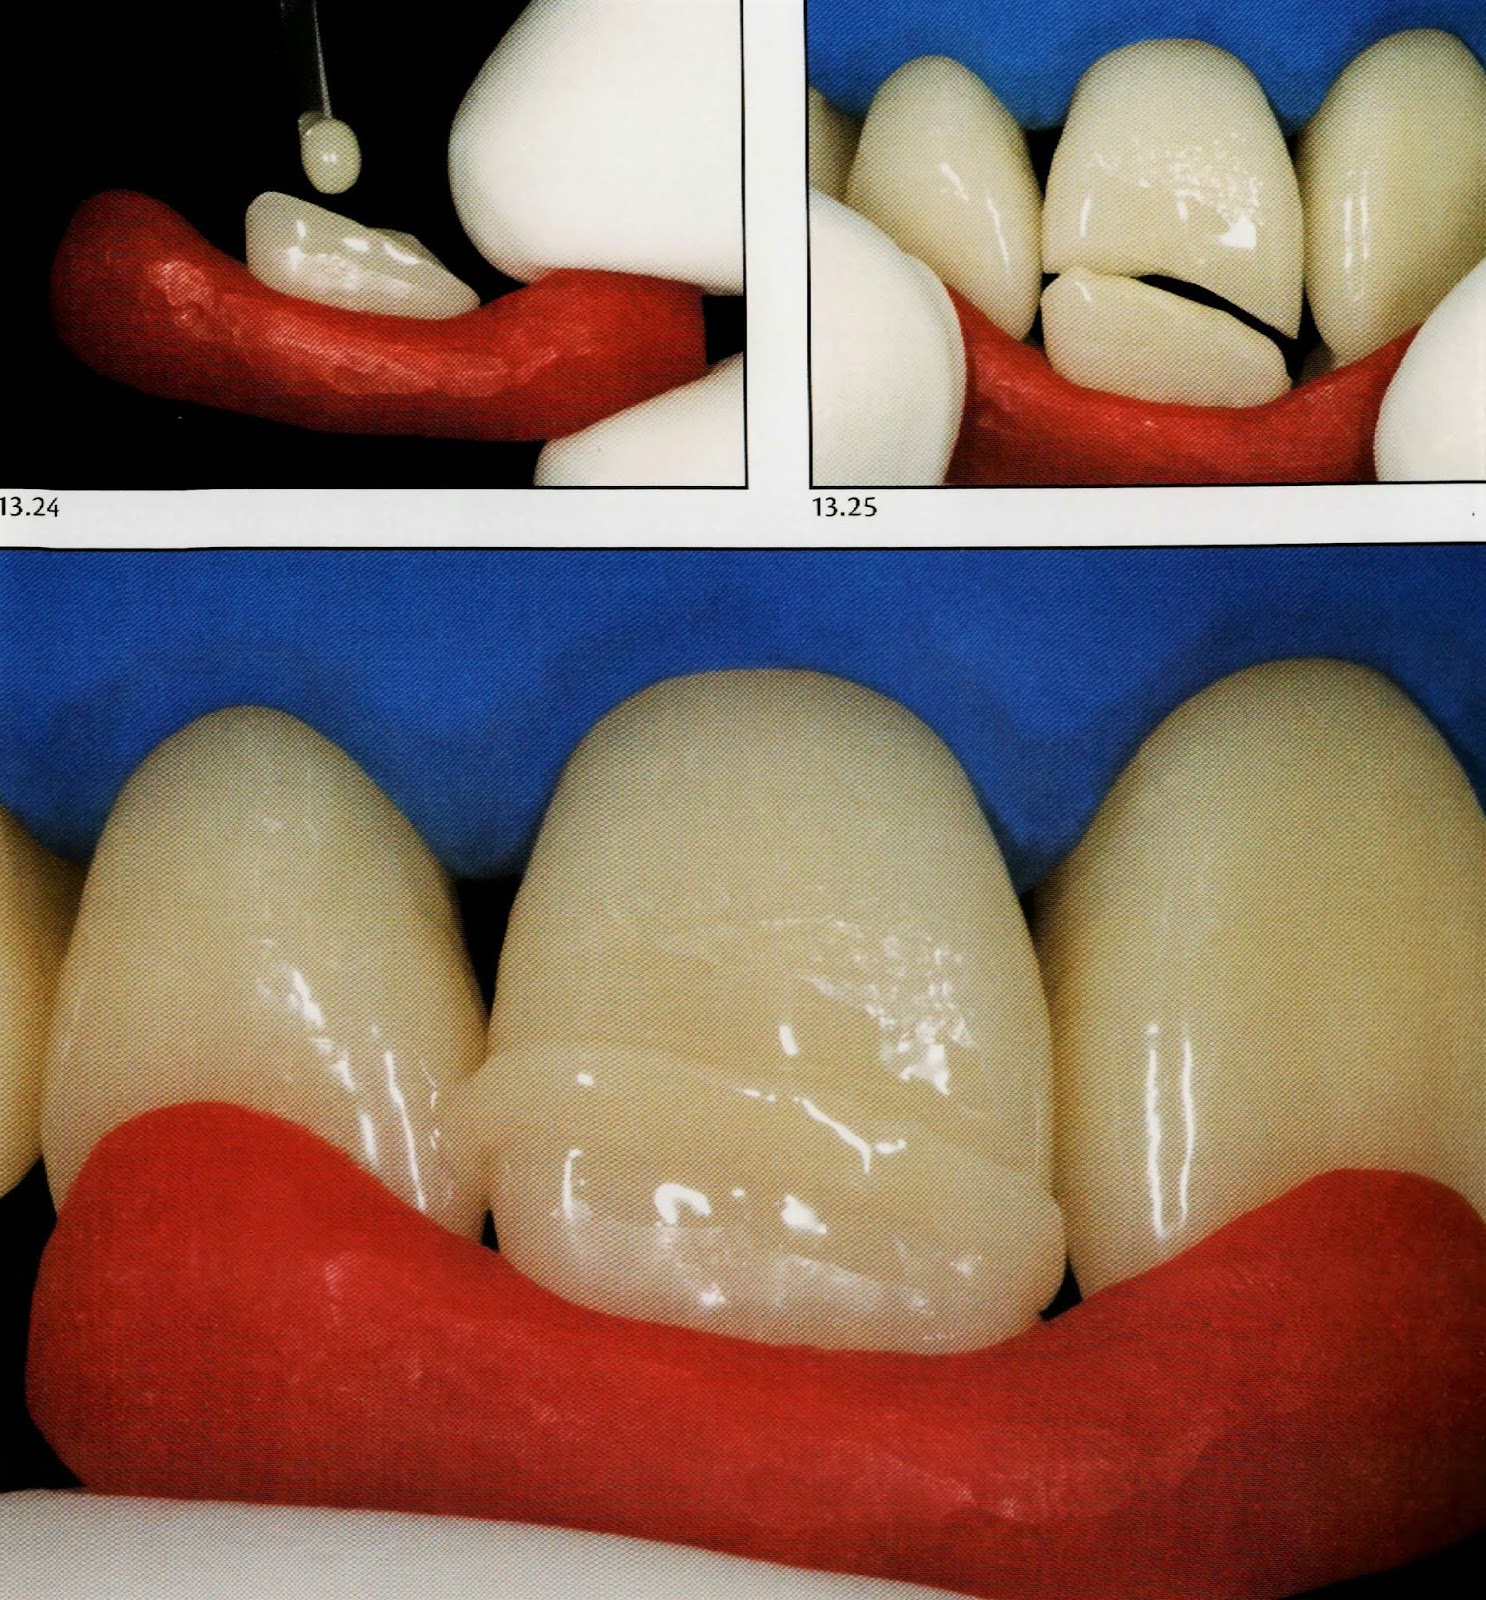


👉🏻 Aesthetically, the result of a fragment reattachment is generally very pleasant. In no other way, it would be possible to restore so accurately function, form and natural texture so quickly in a conservative and biological manner. There is no - and neither ever will there be - a restorative material that overcomes the inherent advantages of keeping the natural tooth structure 🦷.
Stay tuned for the next post, we will discuss tooth fragment reattachment with beveling technique after reattachment.
Islam Zakzouk
DSefa is a blog that's dedicated to bringing you high quality health, lifestyle tutorial and resources on different categories. It's main forus on user experience.


Superb Dr.Islam as usual ������
ReplyDeleteVery nice
ReplyDeleteGood job dr
ReplyDeleteGreat
ReplyDeleteThe body is getting the tooth through the cut and the tooth is under load and is pried in reverse in miniature sums and the steel particles.dentista Dott. Giuseppe Pantaleo
ReplyDeleteThanks dr for this effort
ReplyDeleteCan we use rubber base index instead of acrylic resin?
Other question🙈 how we remove acrylic resin index from treated tooth as we not use separating medium like adjacent one?!