Class IV composite " silicone guide technique "
On Composite
Class IV lesions are those that involve the proximal wall and the incisal edge of the anterior teeth. The most commonly observed cause, especially in young patients, are caries and trauma. They represent a major challenge to the clinician and require special attention when it comes to their appearance mainly influenced by two things, color and shape. The case simulated in this post presents a fractured tooth #21 with the involvement of both incisal angles.
In situations like this, before considering the restoration, the previous evaluation and demarcation of occlusal contacts are essential to ensure that the restoration is accomplished in balance with the stomatognathic system and will not interfere with normal occlusal function.
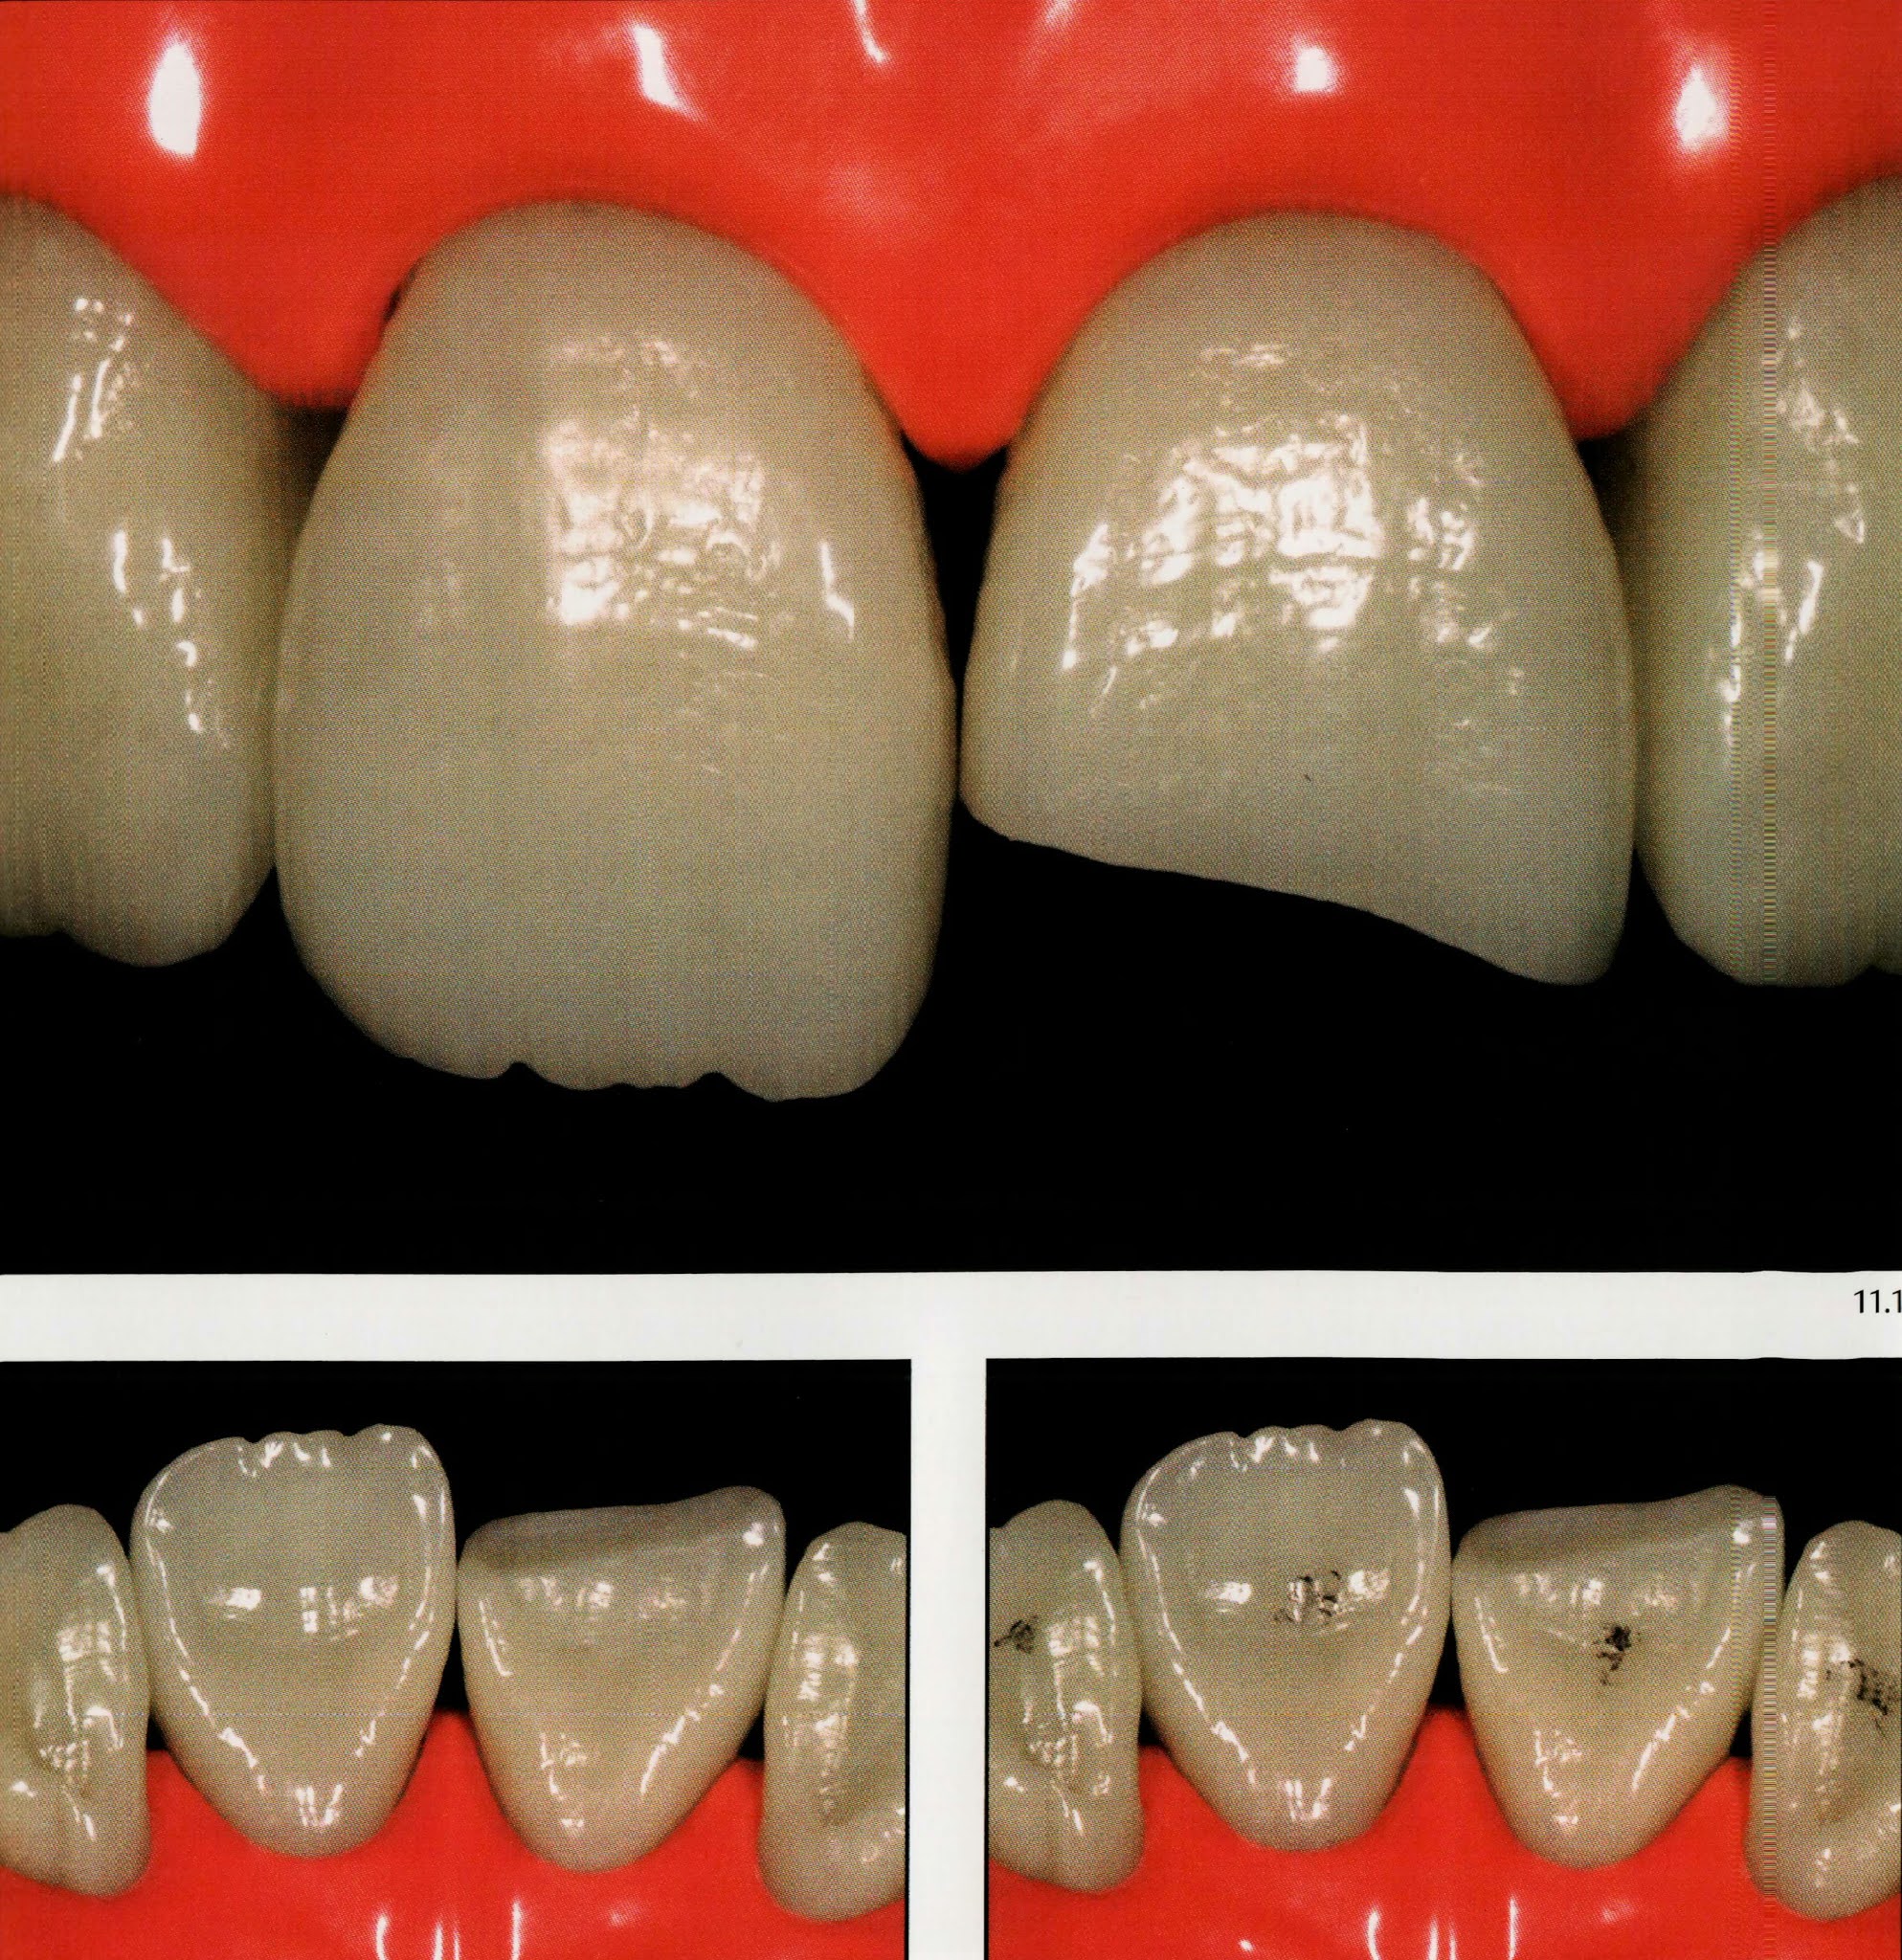
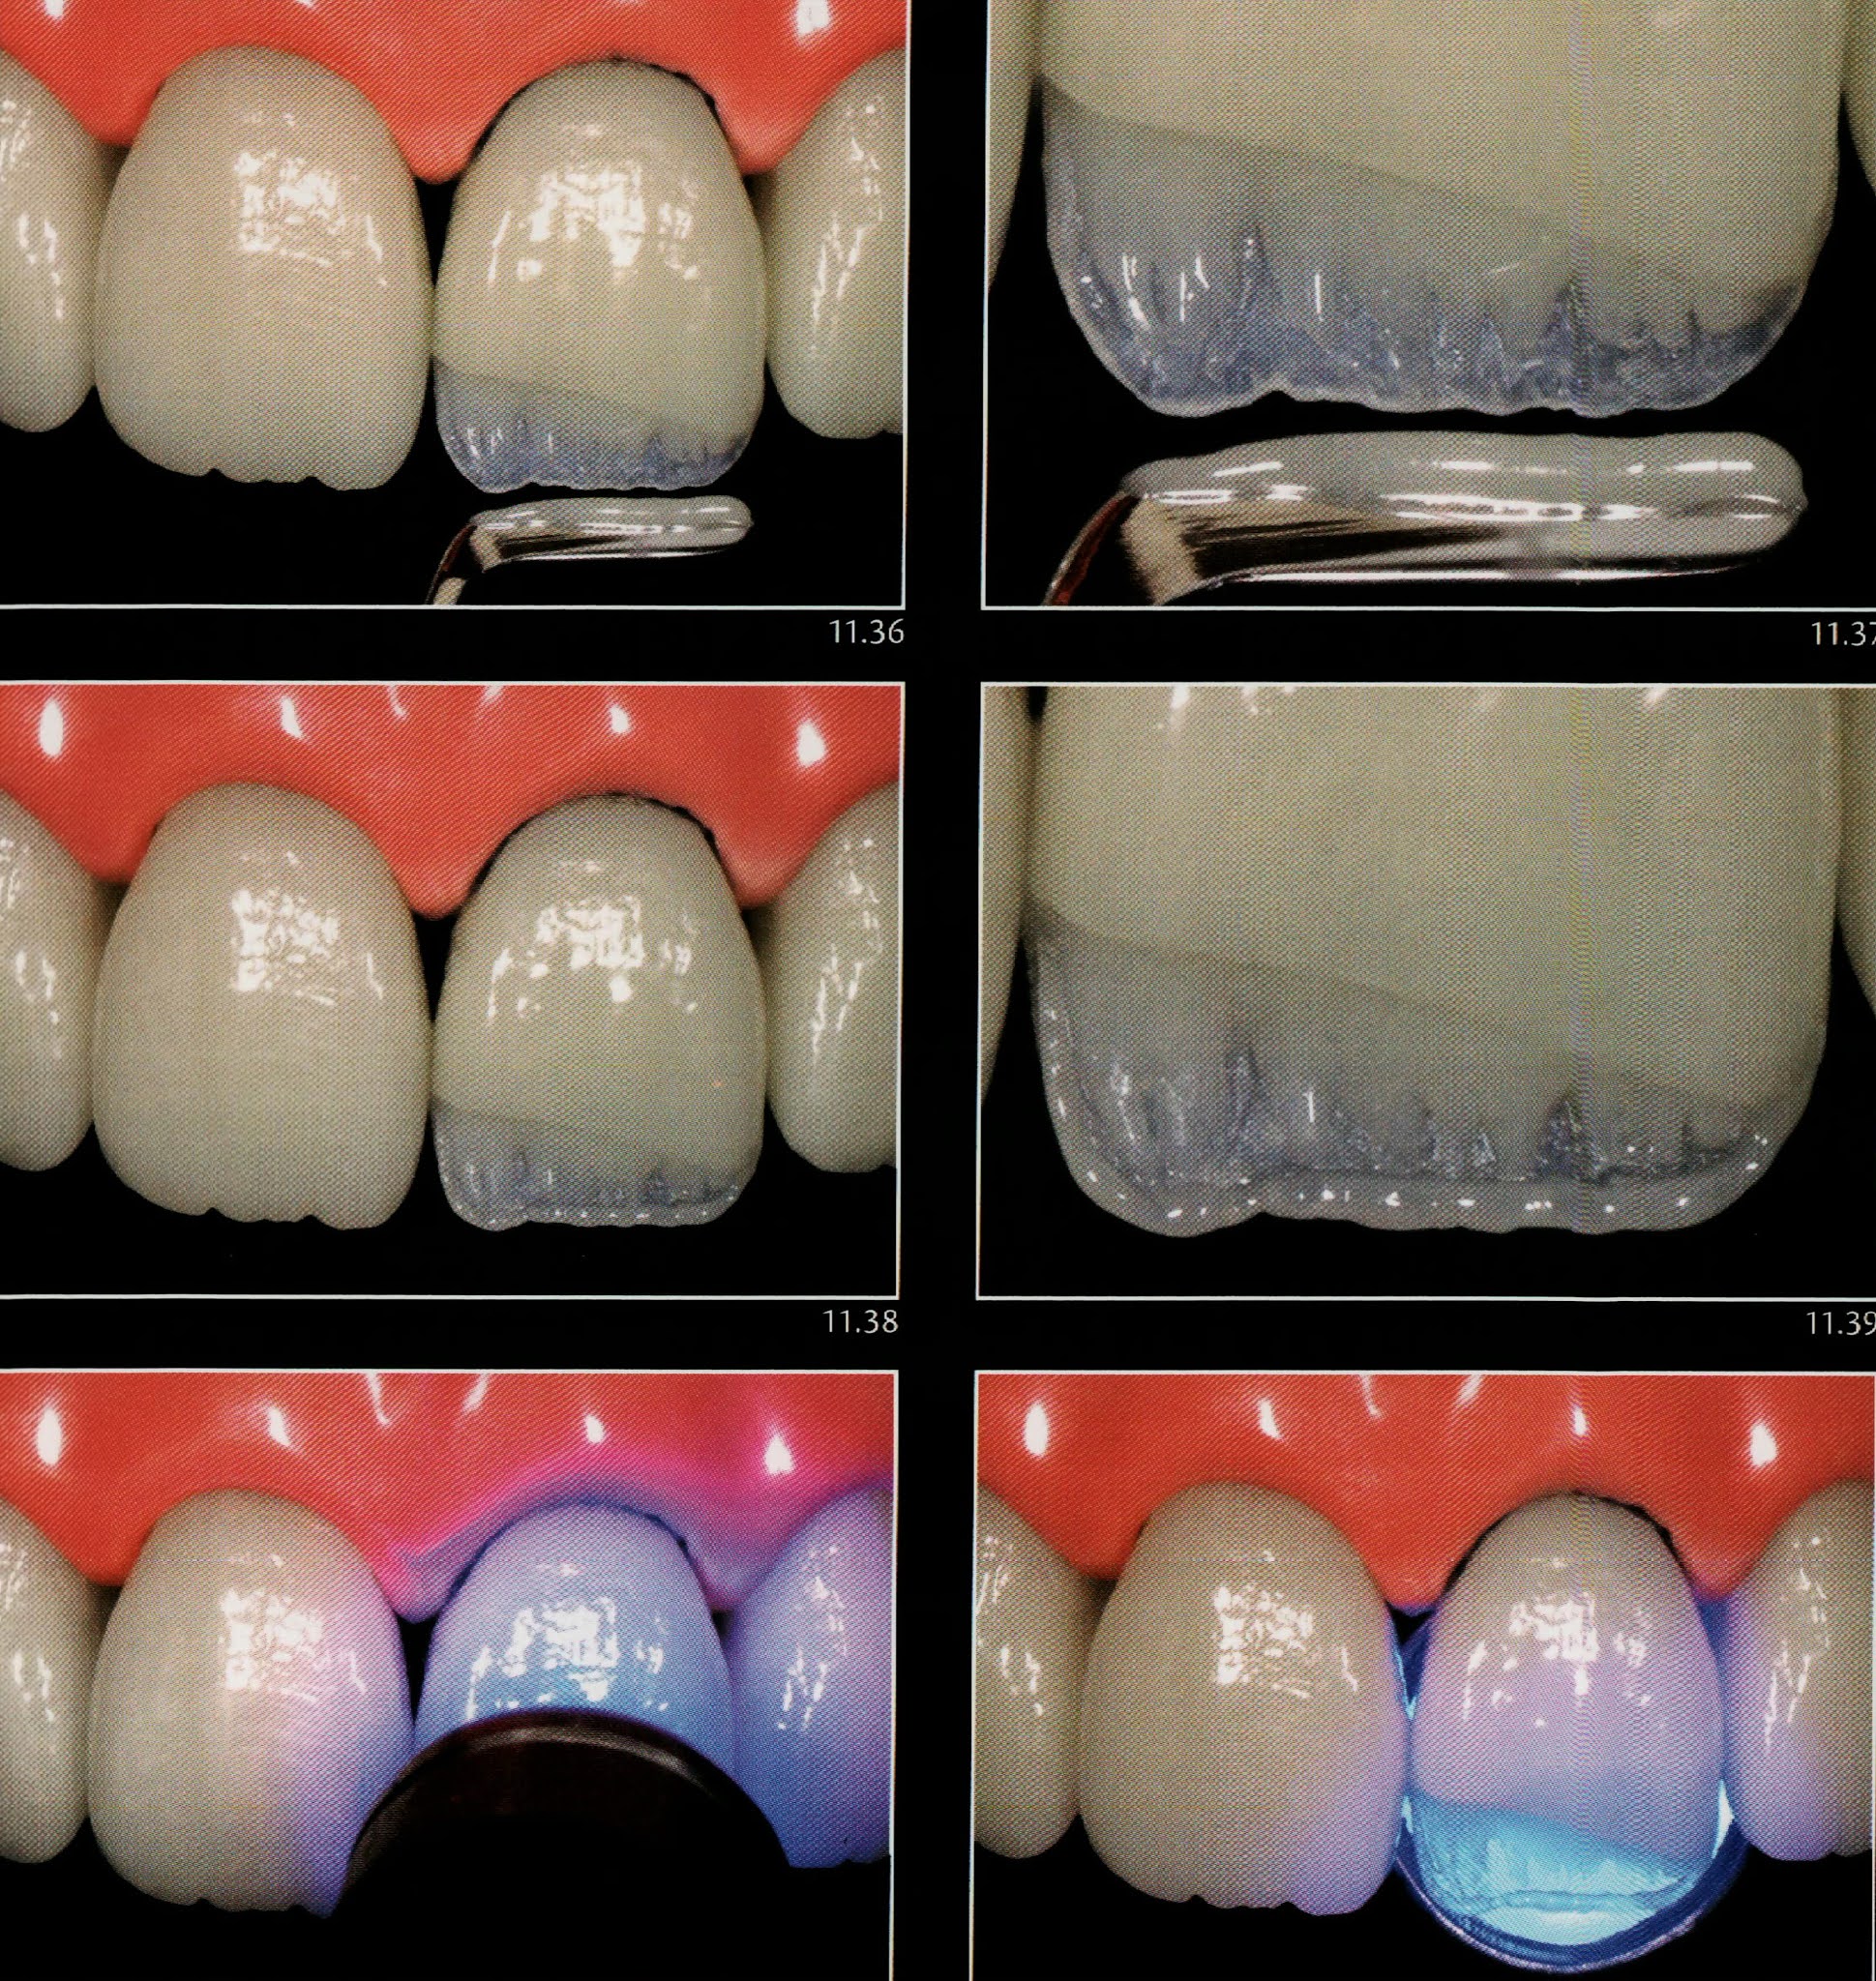
The reconstruction of fractured anterior teeth is undoubtedly one of the situations that require more skill by the clinician. Shape, color and texture are only some of the several aspects that should be assessed thoroughly if is desired to make an imperceptible restoration. In order to properly reproduce the chromatic effects of the tooth, it is essential to select materials with suitable optical characteristics. Thus immediately after performing a prophylaxis different masses of composite resin are applied and light-cured on the tooth to select those that best reproduce the optical characteristics of enamel and dentin. In addition to hue, chroma, and value the translucency characteristics of the dental tissues should be considered. After the selection of the materials, it is interesting to make a trial restoration to evaluate whether the interactions between the different masses of composites will provide the desired chromatic effects.
Of course, for the trial restoration to fulfill its role it is necessary to make it with the same composites that are to be used in the final restoration without performing the adhesive steps. Another point that should be stressed is the importance to carry out the trial restoration as quickly as possible without prior isolation of the operatory field since that leads to dehydration of the tooth and thus to temporary discoloration.
⛔️ Since the primary function of the trial is to precisely evaluate the optical interactions of the composites with the tooth, it would not make any sense to perform it on a discolored structure.
After the trial, it is time to evaluate it and if necessary to repeat it. If the trial result is entirely satisfactory, it is interesting to record a “ recipe “ of what was done, noting in a chromatic map the colors and thicknesses of composite used for each region of the restoration.
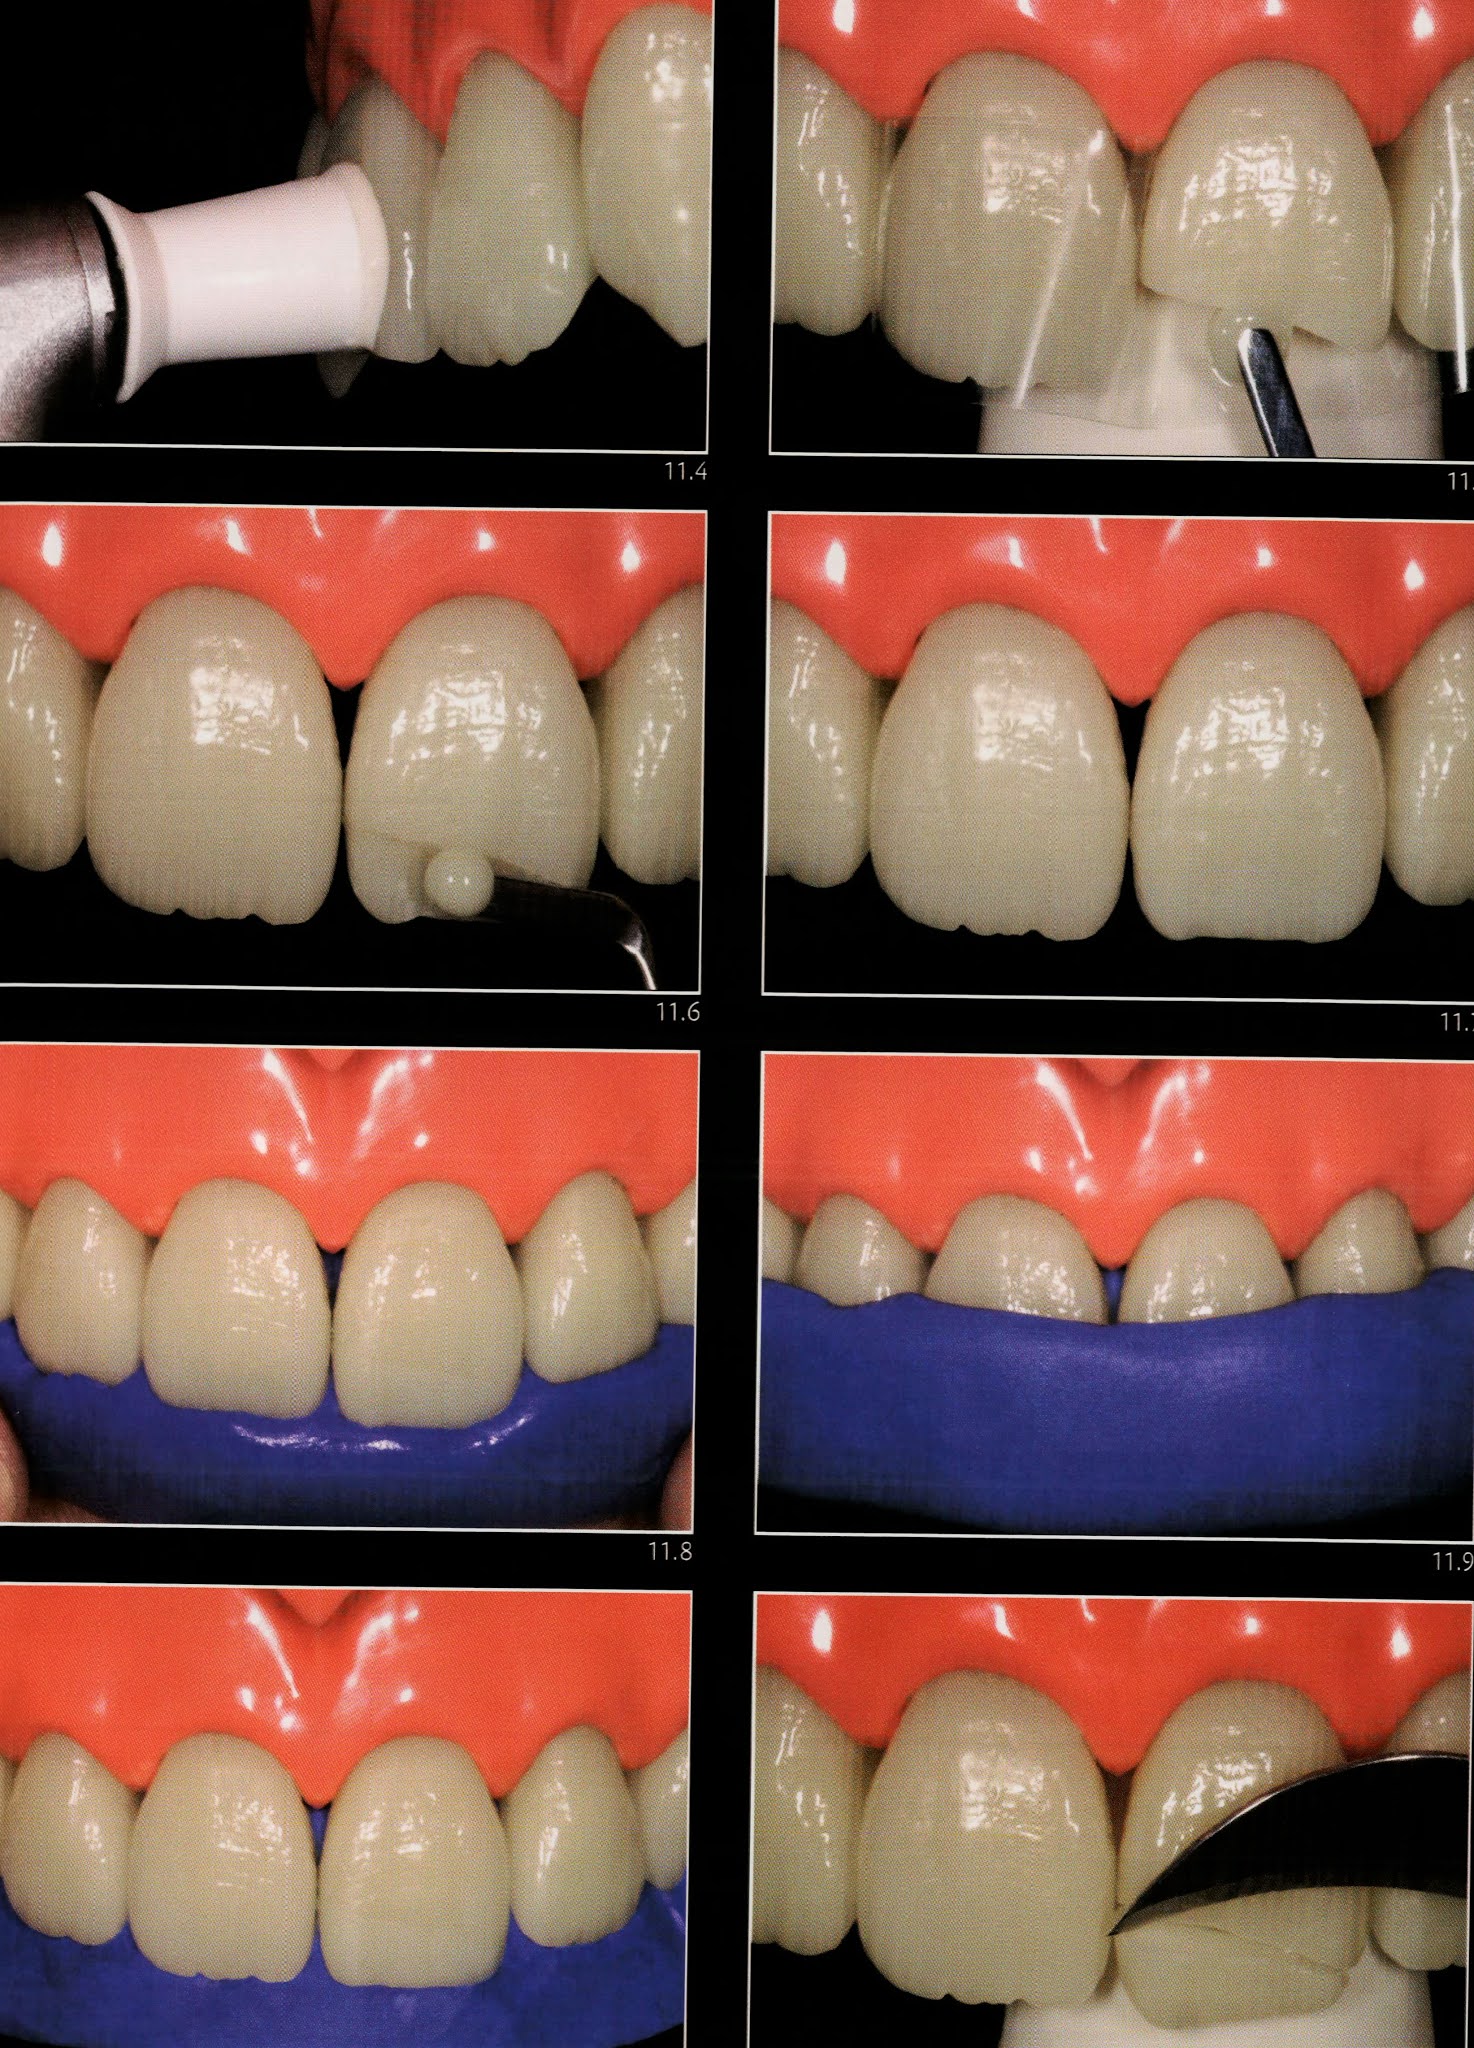
This is an important maneuver that facilitates the transfer of the result determined in the trial to the final restoration. On the other hand, if the result of this first trial is not appropriate, evaluate it carefully trying to find out where it was not correct and then do it again until the ideal combination of composites is reached. One more important benefit of this trial is the possibility of transferring the form obtained in the trial to the final restoration. If you achieve a shape close to the ideal, it is possible to fabricate a silicone guide from the trial itself. However, a very easier manner that greatly facilitates the achievement of highly natural results is fabricating the silicone guide on a plaster model with a diagnostic wax-up.
The process of removing the trial is extremely simple since it was not bonded prior to the application of the composite. Thus, with the aid of a scalpel blade, the trial is easily detached from the tooth remnant.
⛔️ Take care to ensure the complete removal of the composite as remnants on the surface could significantly impair the performance of the final restoration.
For fabrication of the silicone guide on a diagnostic waxing, an impression the arch is initially obtained then a plaster model is fabricated. On the model, the waxing is made reproducing the desired shape of the restoration. Next, a high viscosity addiction or condensation silicone impression is obtained from the wax-up model. Further, this impression is cut in the region of the incisal edges with a scalpel blade so that the cut does not invade the region of the incisal edge. After cutting, a matrix is obtained which will allow for the transfer of the shape of the future restoration obtained in wax. When properly fabricated, the matrix facilities to obtain an ideal form of the incisal and the palatal surface and allows for a more accurate stratification of the increments related to dentin and enamel.
As mentioned earlier, one can fabricate the guide directly in the mouth, taking the trial restoration as a reference. However, the advantages of fabricating on the wax-up model are undeniable. It is easier to define the anatomy on the laboratory bench than directly within the mouth. Moreover, the transfer of these steps to the laboratory allows for a reduction of valuable clinical time.
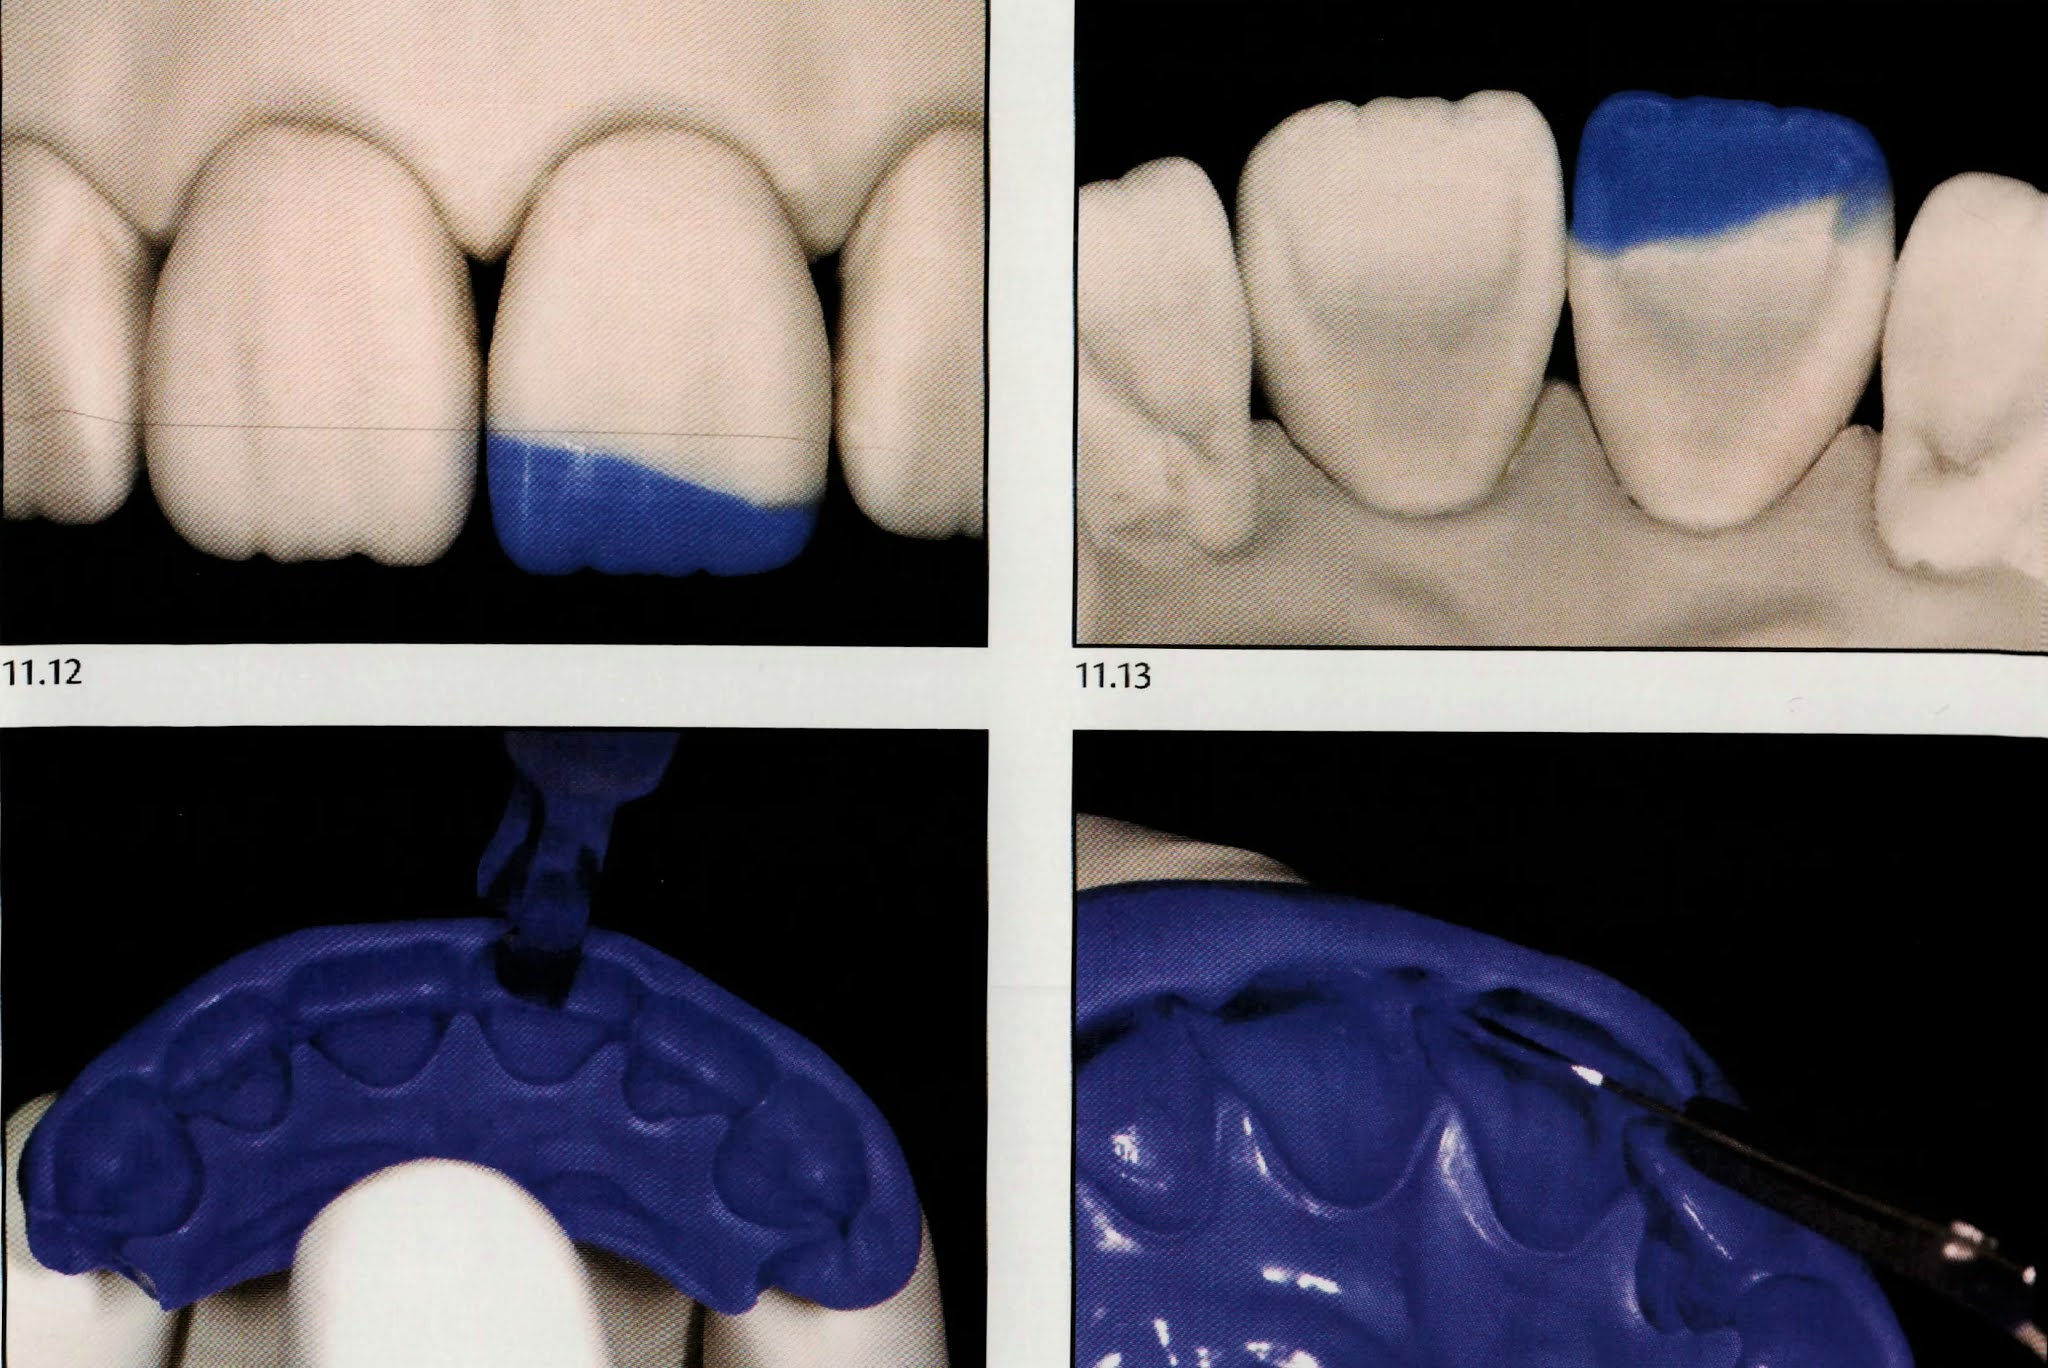

With the matrix in hands and the chromatic recipe obtained the trial restoration, so now we can start the restorative session.
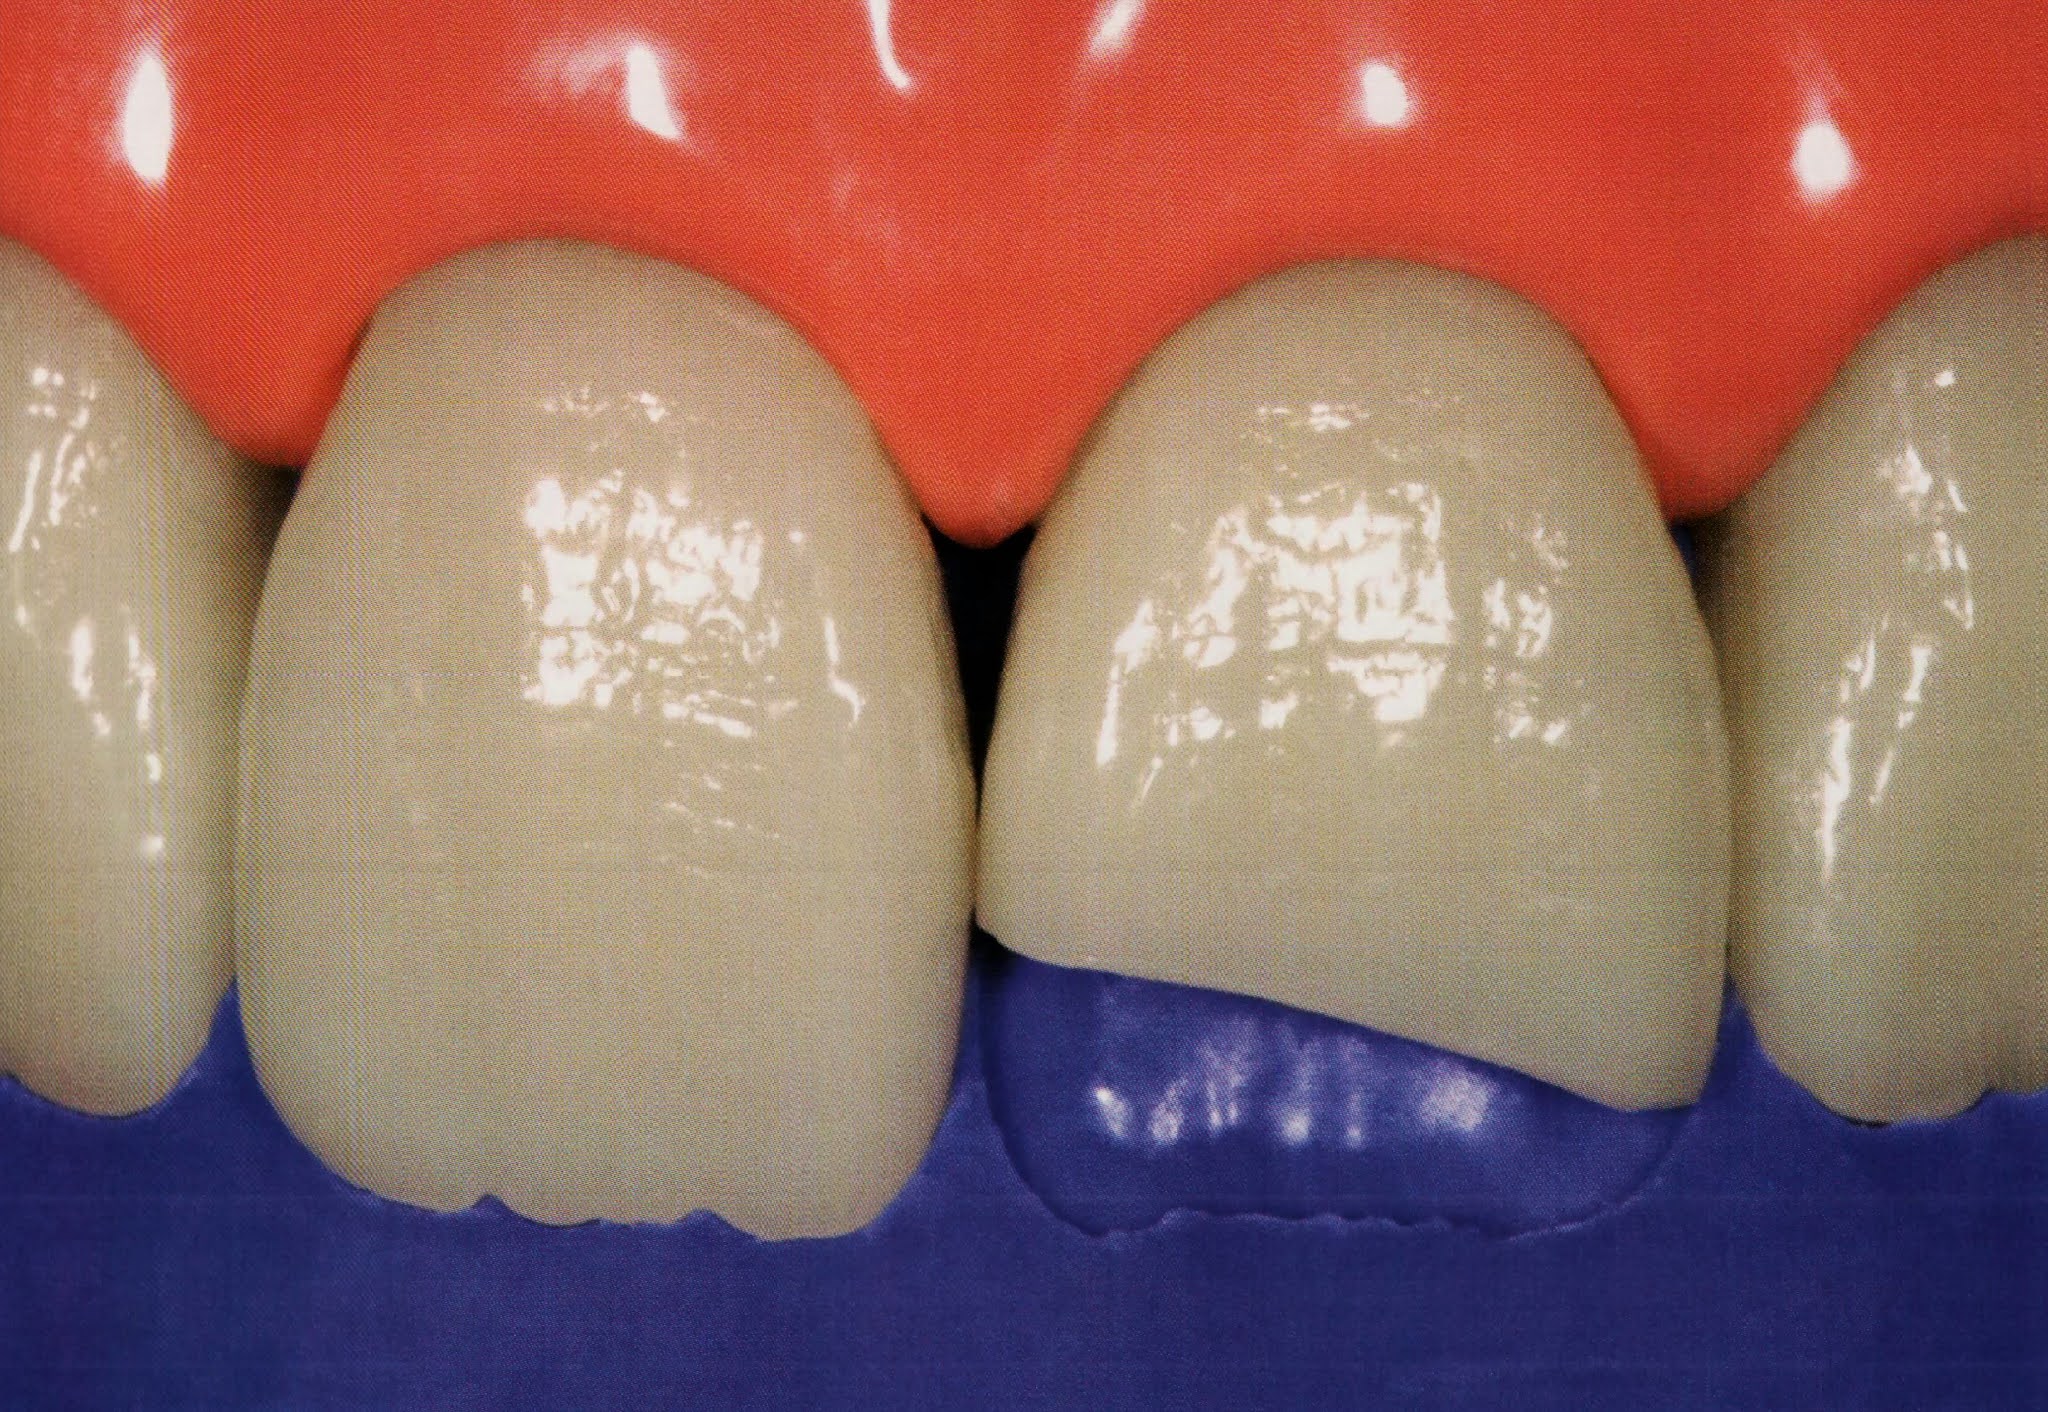
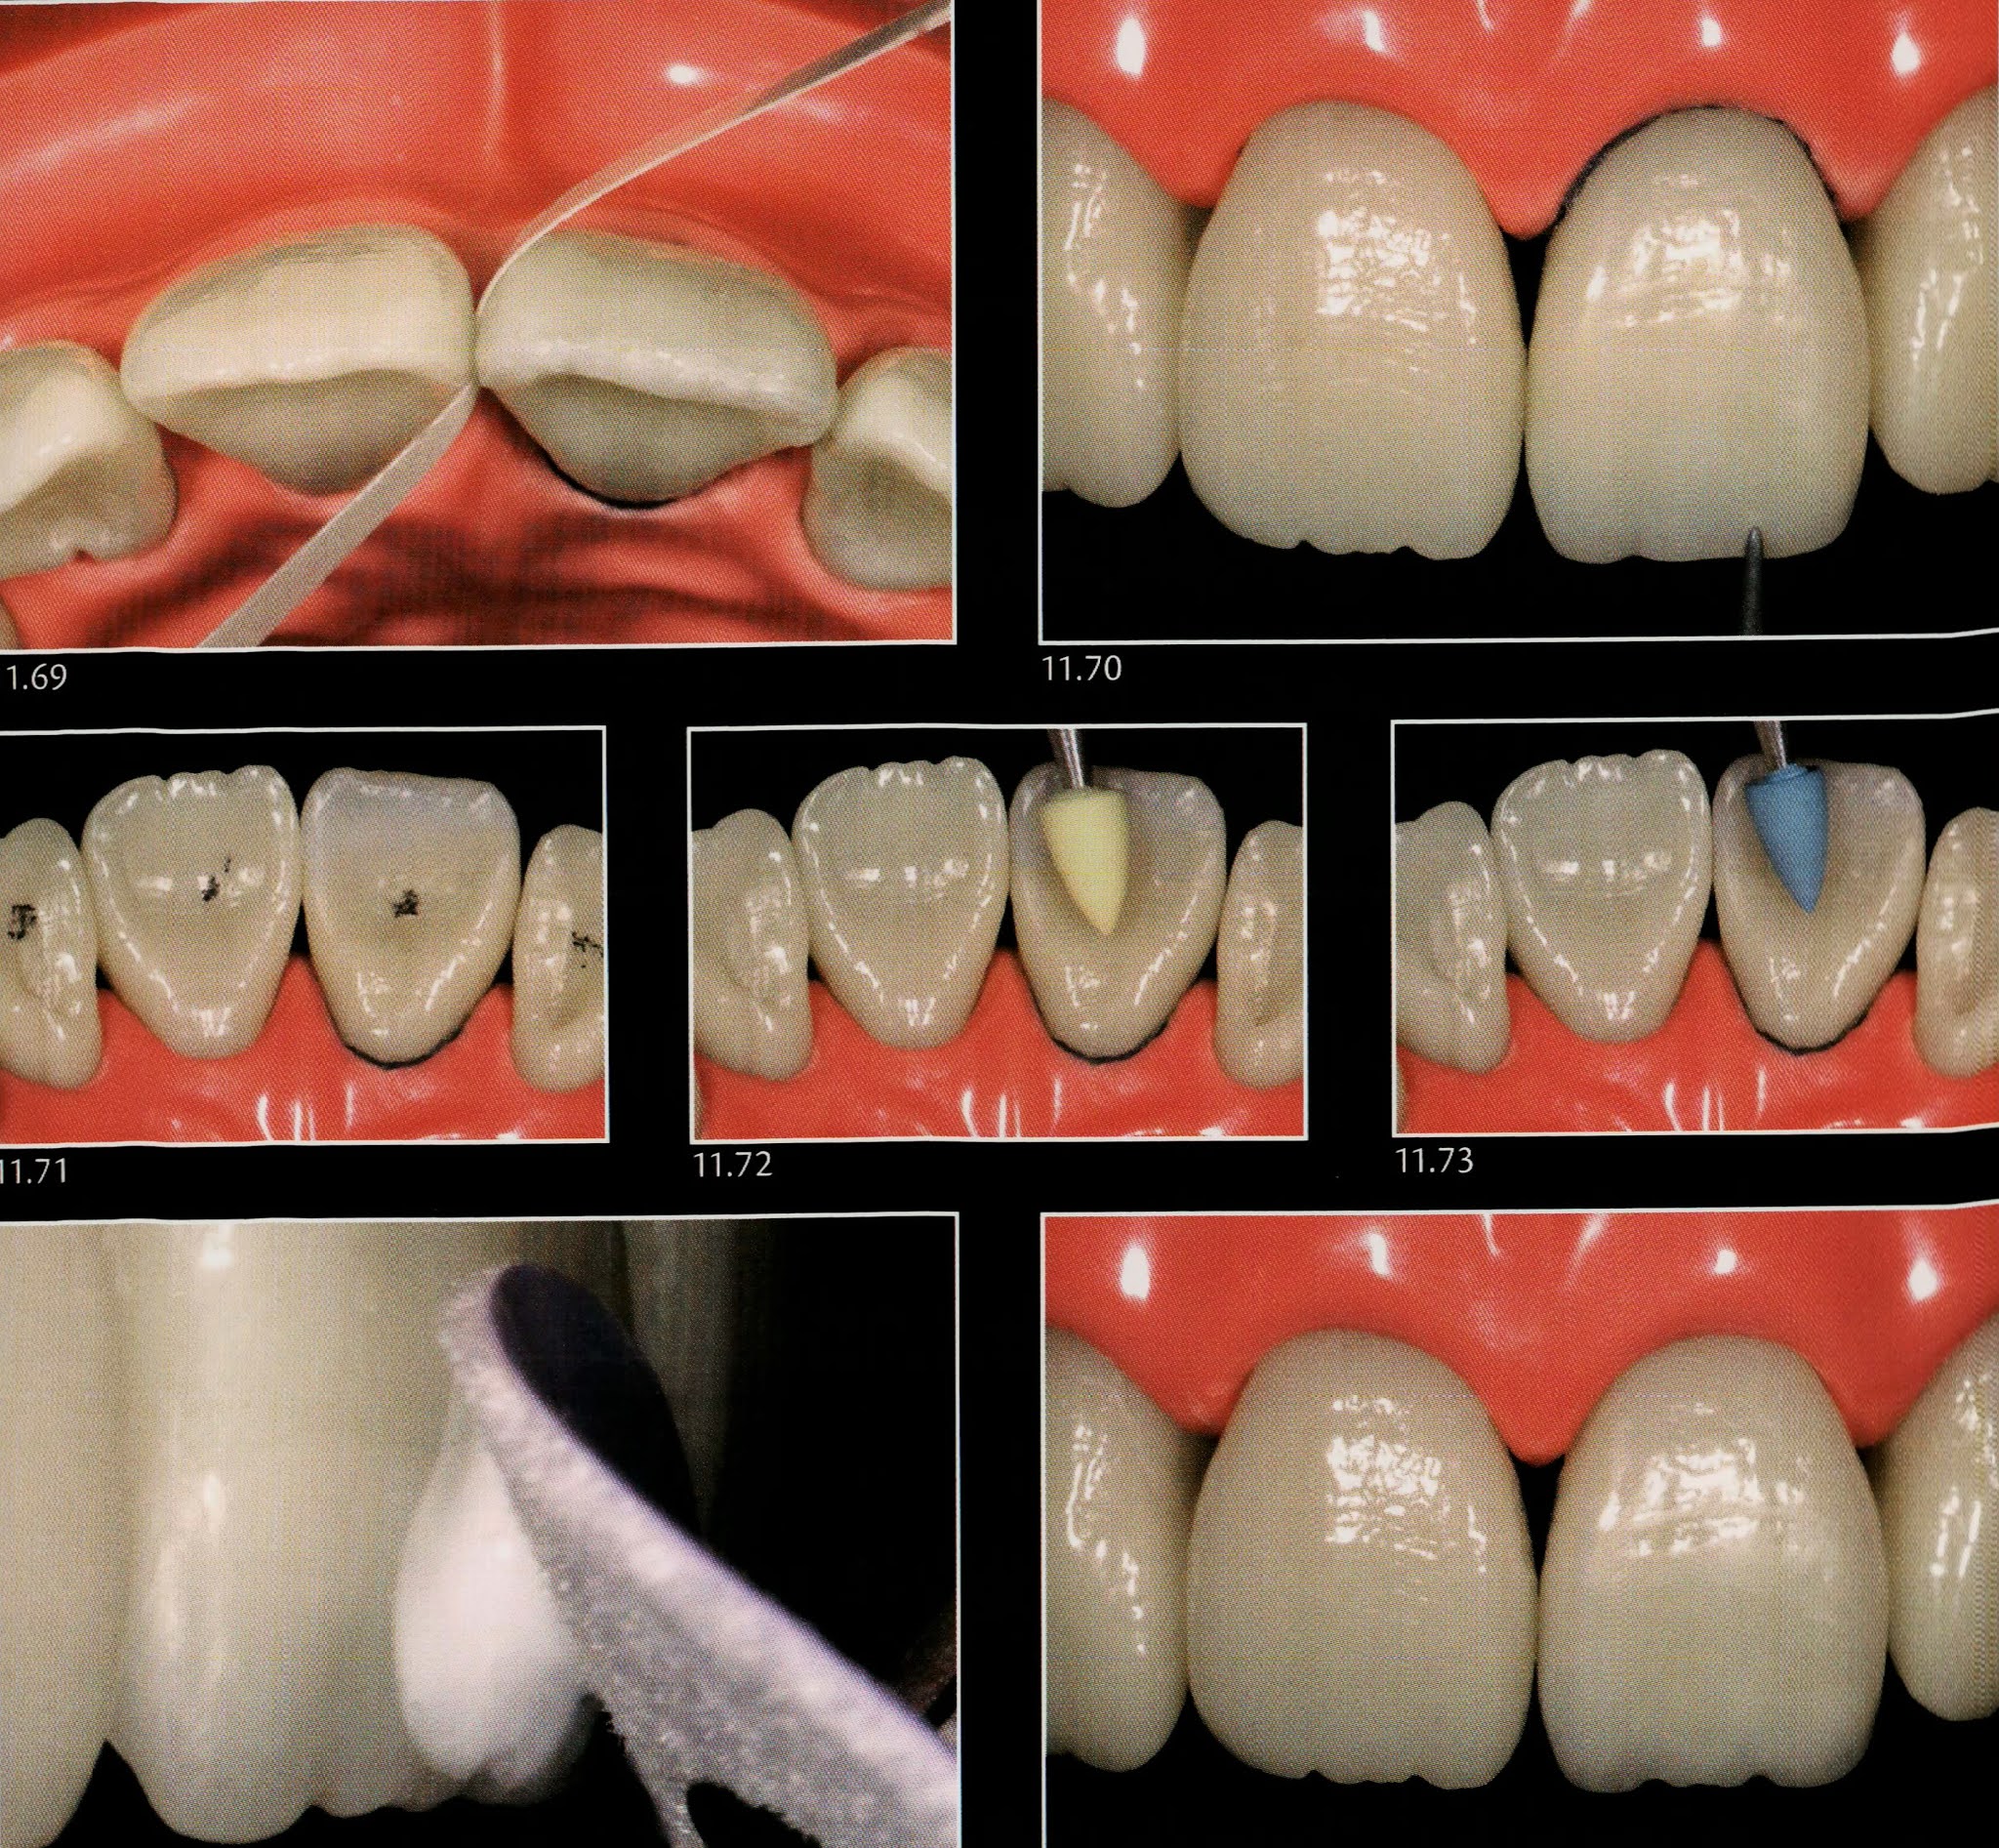
👉🏻 In situations like this, in which the restoration will be carried out in an anterosuperior tooth and the margins are found distant to the gingival tissue, it is possible to perform the isolation without a rubber dam, without compromising the quality of the isolation. Thus initially a retraction cord was inserted into the gingival sulcus and the adjacent teeth were protected with a sealing tape to avoid inadvertent contact of the acid and the components of the adhesive system.
Note that the acid extends at least 2 mm beyond the margins of the preparation. After conditioning of the tooth, the adhesive is applied and light-cured. At this point, the surface is ready to receive the composite which is initially applied to the silicone matrix. Every effort should be taken to minimize the incorporation of air bubbles into the composite. This first increment should be made with a thin layer of a composite with strength and optical properties similar to that of enamel, taking care to slightly exceed the fracture line, which normally is slightly evident in the matrix.
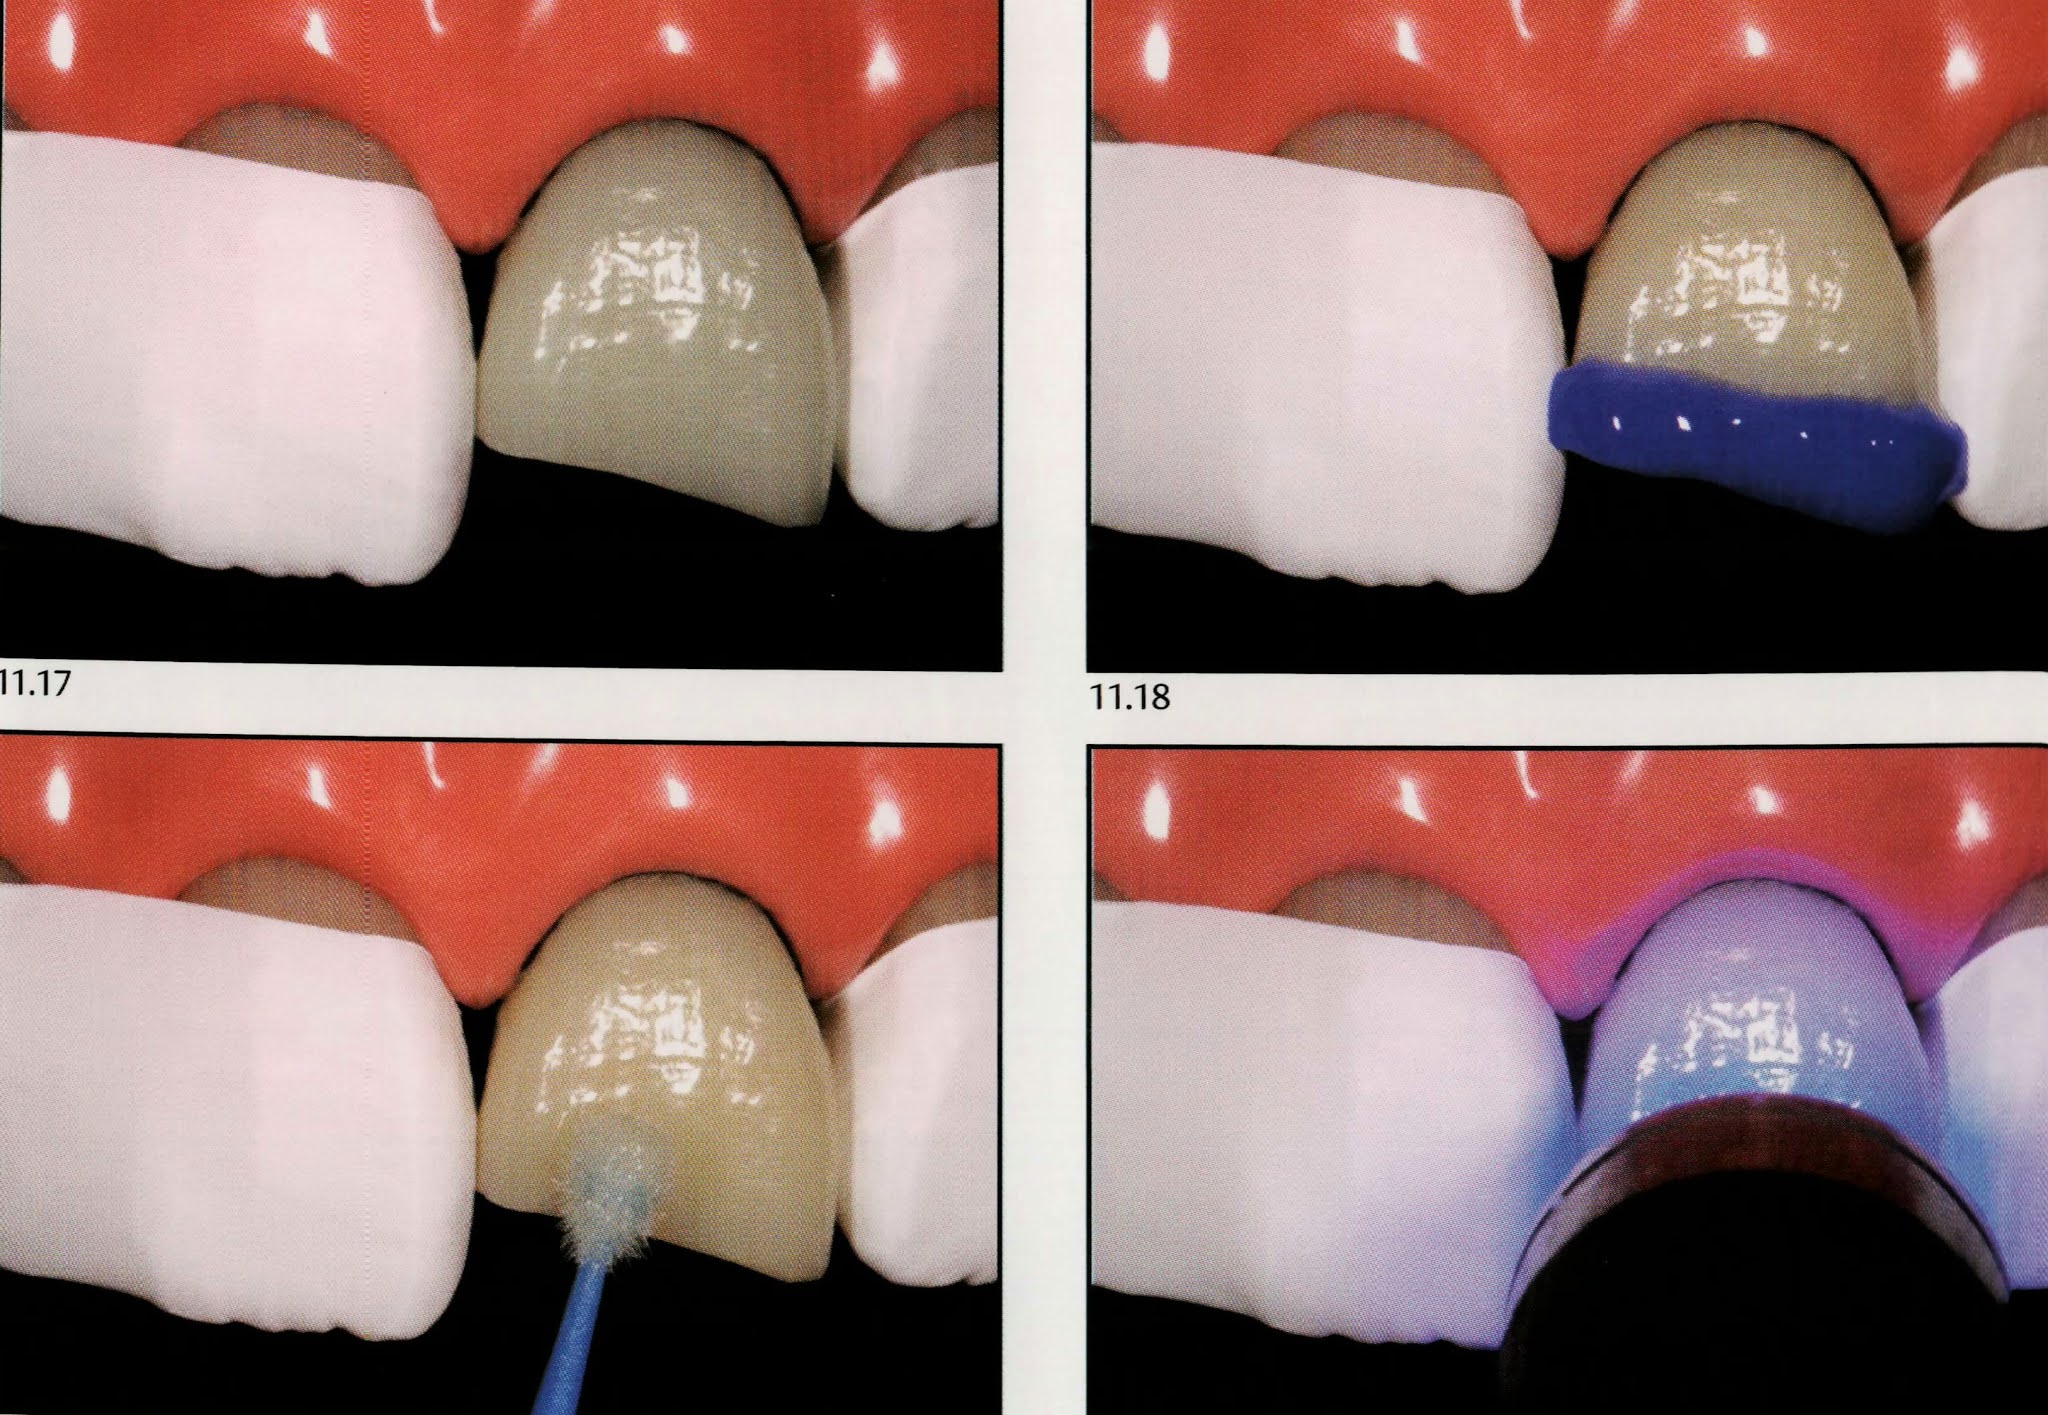

One of the requirements to ensure the success of an aesthetic anterior restoration is to apply the composite of enamel and dentin in thickness compatible with the tissues to be replaced. Thus when the composite properly applied and kept in position by finger pressure the close contact between the composite resin and the tooth remnant should be verified. It is important that the composite makes contact with the tooth remnant along the entire palatal margin so that the increment does not peel off after the removal of the matrix. Then the composite is light-cured for the time recommended by the manufacturer and the matrix is removed. Right now, due to proper planning, the palatal surface and tooth contours are already reproduced.
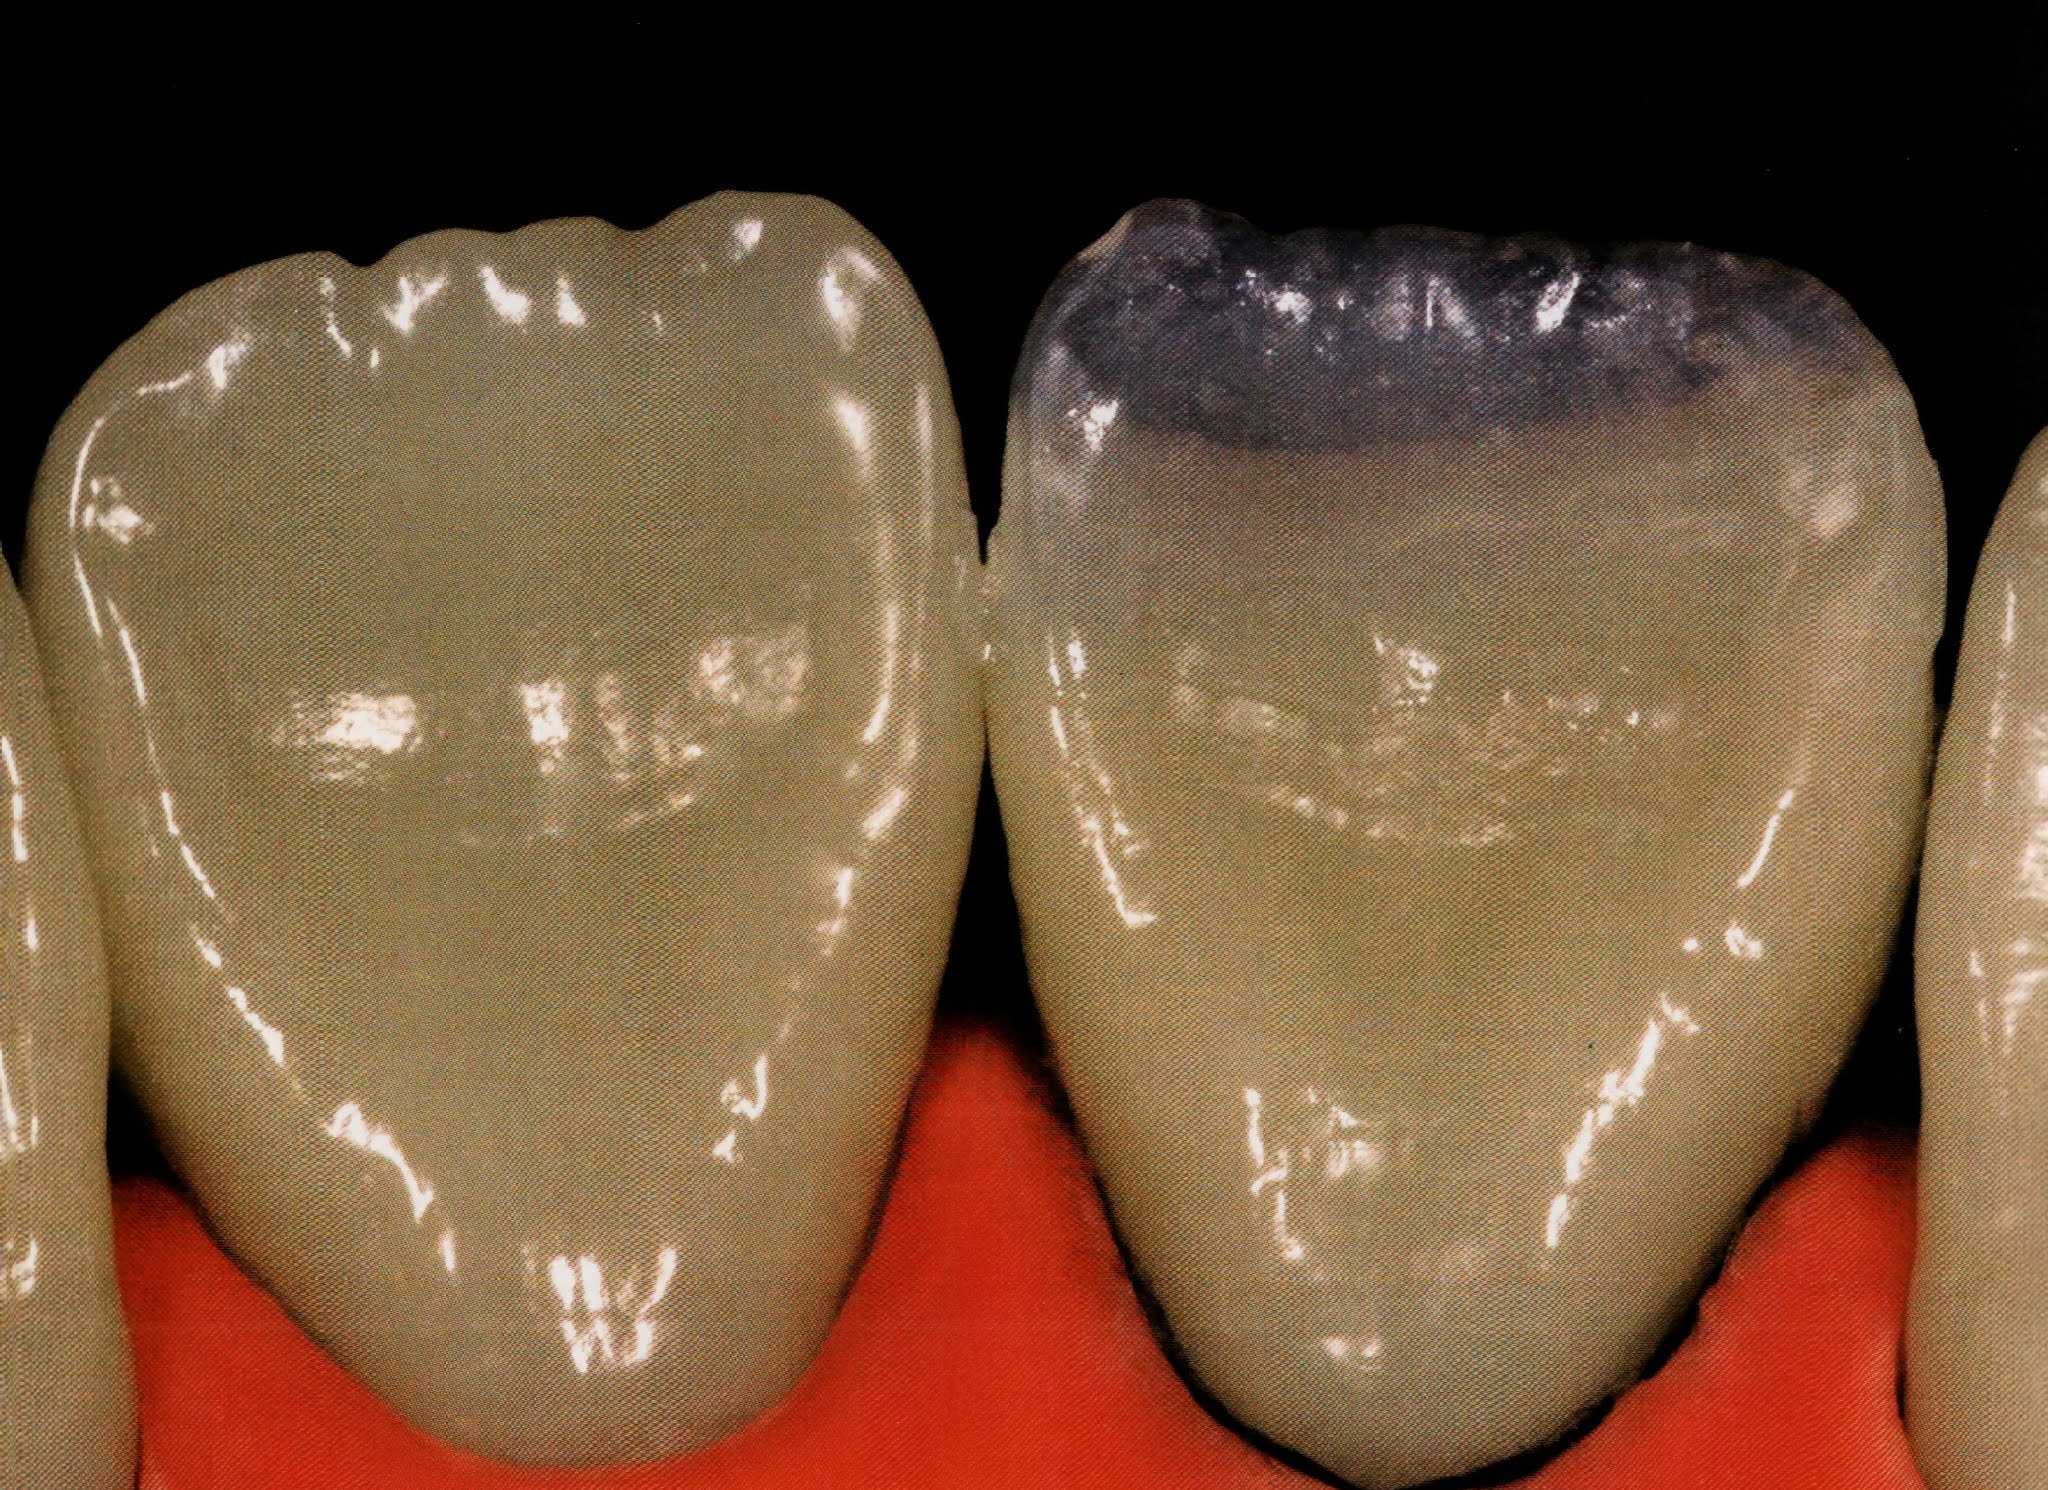
👉🏻 Note the high translucency and the small thickness of composite required to remain space for the resin increments responsible for the reproduction of dentin. Because one of the goals of the restoration is to reproduce the optical behavior of the natural tooth, composites similar to enamel (more translucent) and dentin (less translucent) should be used. It is evident that the degree of translucency varies significantly and should be observed at the time of color selection, and performing the trial restoration.

After the reconstruction of palatal enamel, it is time to start to reproduce dentin. At this moment, it is essential not only to give attention to the use of more saturated and less translucent composites but also to the reproduction of the anatomical contour of dentin. In other words, although the use of a composite of suitable translucency and shade is essential, it is imperative that they are shaped similarly to what occurs in the dentin of natural teeth. Thereafter, a composite increment with low translucency and a higher degree of saturation is firstly added and shaped with the aid of spatulas and brushes. This increment reproduces finger-like projections, generally three corresponding to the developmental or dentin mamelons through the use of the so-called “ dentin “ composite.
From an incisal view, one can check whether this increment does not invade the space for labial enamel. In fact, at this point, there is still room from the labial aspect for the proper masking of the tooth-restoration interface. Only after confirming that the outline is correct without invading the space reserved for other increments, light curing is performed.
👉🏻 Note that during the light-curing the composite is already able to limit the passage of light without, however, blocking it.

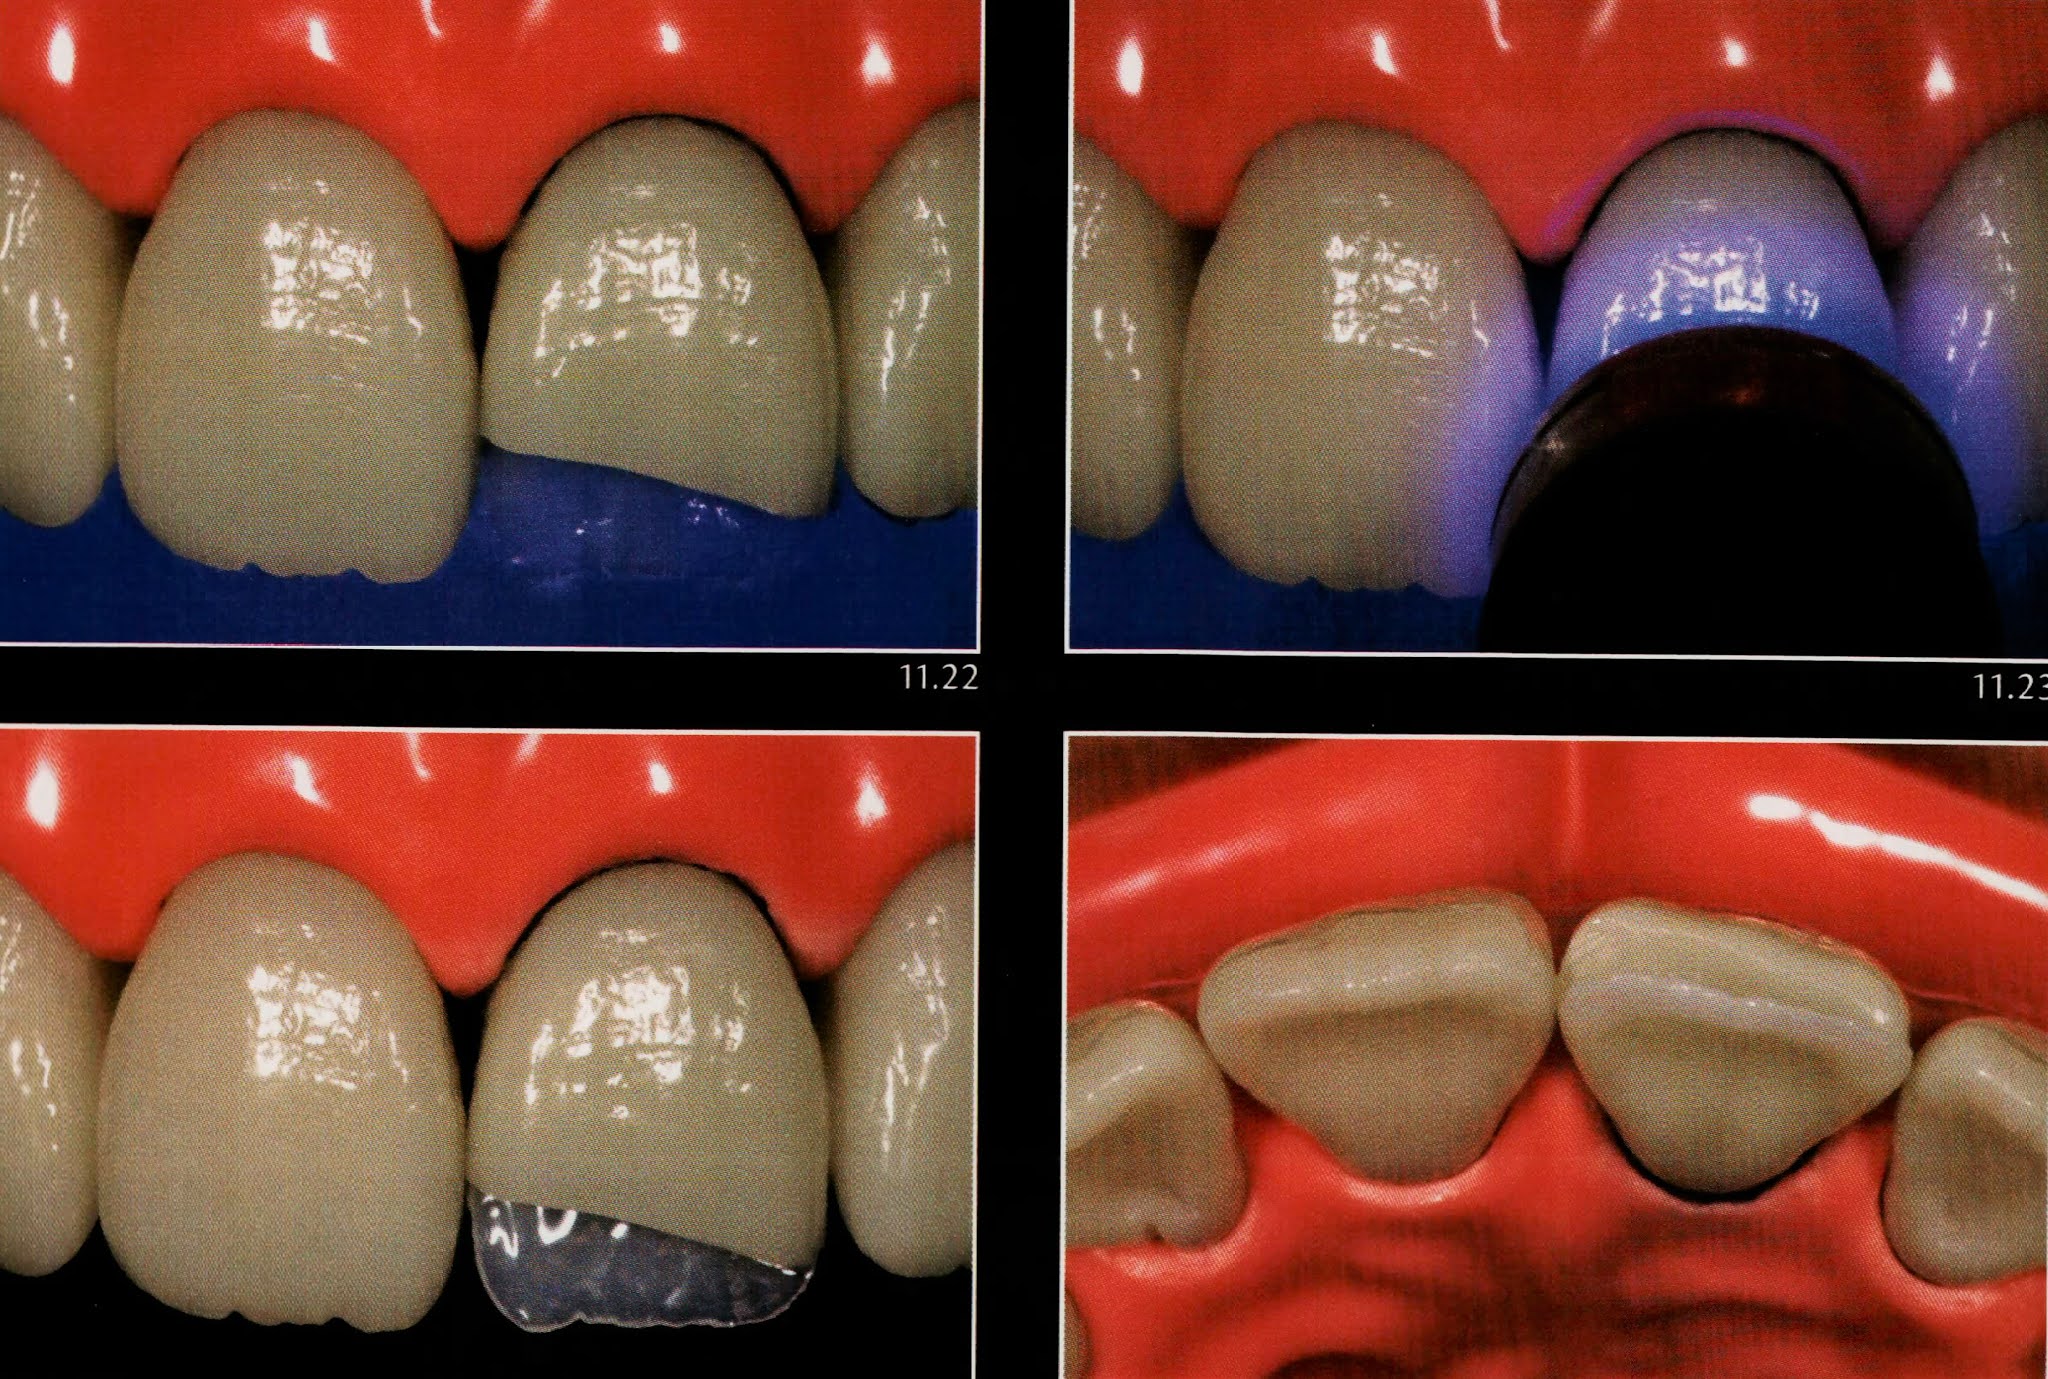
After the reconstruction of the dentin mamelons, the next step is to reproduce the incisal opaque halo, an optical effect commonly observed in the incisal edge of natural teeth. Thus, when making the chromatic map and shape selection, one must note the correct thickness and design of this increment from observing the adjacent teeth aspects that vary from case to case. The opaque incisal halo is one of the beautiful optical effects arising from the interactions between the teeth and light and is usually quite subtle and presenting a white-opaque or orange shade. Thus, one must be subtle when reproducing this effect in the restoration. Although the opaque halo effect is purely an optical phenomenon created only through the interaction between the light and the shape of the incisal edge. The reproduction of such a feature in restorations if facilitated by localized use of materials with greater opacity. The technique presented here involves the application of a bead of low translucency composite -generally the same used in the reproduction of dentin- to the region of the incisal edge.
See that 👀 the increment use is noticeably thin and follows the contour of the tooth previously developed by the silicone guide. Then, light curing is performed.

In this step, the second increment of composite for dentin is inserted and shaped in order to correctly reproduce the final shape of the developmental lobes and dentin mamelons. As already mentioned, there are generally three developmental lobes which remind us of three middle fingers of the hand. They are separated by valleys which can according to each case be more or less pronounced. Another important aspect is that, like the three fingers, the tips of the three lobes are usually positioned at slightly different heights in relation to the incisal edge.
Over the years and with the wear that commonly occurs in the incisal region, the tip of the mamelons will often be exposed. This feature, of course, should be evaluated prior to the layering of the restoration since it leads to the modification of the desired contour of the dentin increments. Another important tip for making a stratified restoration more natural is to perform small “cutouts” on the tip of the mamelons. This is an effect commonly observed in natural teeth and which gives a very pleasant aspect to the restorations. At this point, the composite is light-cured.


With dentin lobes appropriately shaped by the increments above, it is time to apply a more translucent composite in the incisal region, so as to fill the valleys between the mamelons and the space extending from the tip of the incisal opaque halo.
👉🏻 Remember that the bluish appearance of the translucent incisal halo, seen under reflected light, is not achieved through the application of composites or blue inks, but composites with light opalescence able to achieve a chromatic appearance by the same optical mechanisms that lend the natural tooth its shade characteristics.
⛔️ Of course, not all teeth have striking incisal characterizations, so the degree of translucency and opalescence should be selected case by case.
In the situation shown here, a highly opalescent composite was applied to the incisal region so as to fill the entire space between the mamelons without invading the space reserved for the labial enamel. Then, light-curing is implemented.


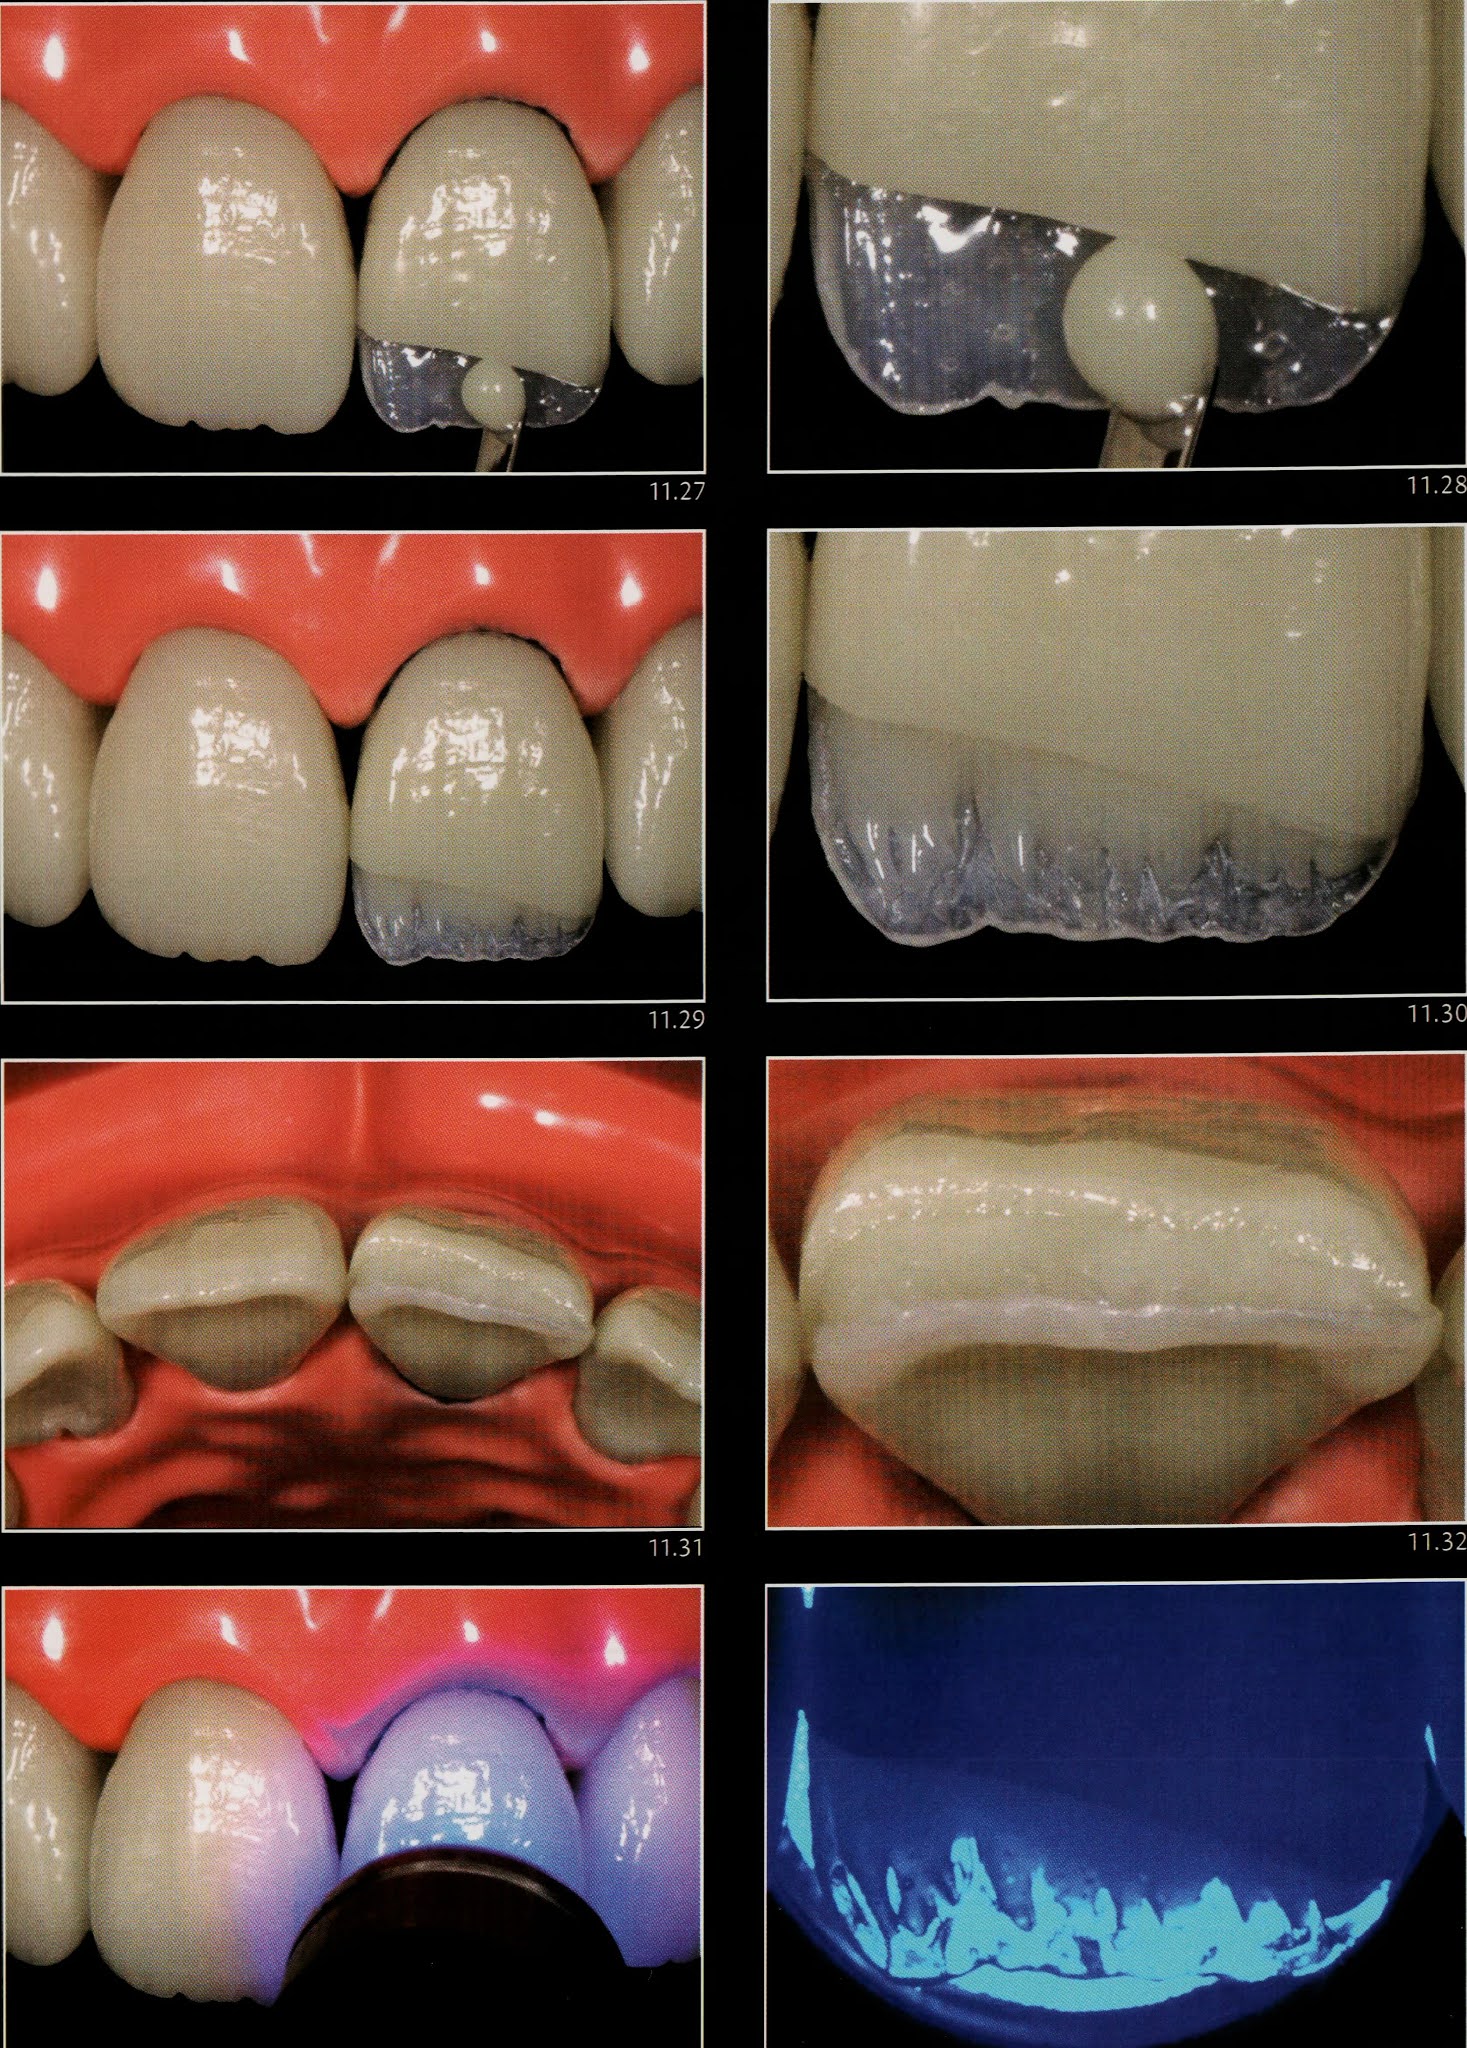
It is time to apply the last increment of the composite restoration in order to complete the volume of the crown, with the least excess as possible, without conversely lacking restorative material. Evidently, this increment is selected for a composite with similar characteristics to the degree of translucency of enamel compatible with the level of disclosure desired for the incisal characterizations. In other words, the more striking the incisal features are, the more the translucent should the last increment be and vice versa.
👉🏻 The composite selected should have acceptable polishing characteristics since the brightness of the final restoration is determined by it.
In doubt, choose nanoparticulate or microparticulate resins, which generally imparts an improved surface smoothness.
⛔️ Special attention should be recommended to the sculpting of the last increment since the difficulty and time required to finish the restoration are closely related to the quality of this last composite layer.


With hard training and gained experience in the use of composites, it is possible to perform restorations with a minimal need for finishing and polishing procedures.
The finishing and polishing procedures are crucial to the success of aesthetic restorations. For now, it should be clear that there are different materials and instruments capable of providing a successful final result and their selection is dependent upon the characteristics of the case and, of course, the operator’s preference.
A thoughtful reproduction of macro and micromorphology of the tooth surface is critical for successful restorations, contributing to the masking of the interface and ultimately the integration of the aesthetic restoration.


Remember that any type of cavity preparation was performed whatsoever, without prejudice to the aesthetics, function, or strength of the restoration.
Islam Zakzouk
DSefa is a blog that's dedicated to bringing you high quality health, lifestyle tutorial and resources on different categories. It's main forus on user experience.


Great Dr thank you
ReplyDeleteJust admiring your work and wondering how you managed this blog so well. It’s so remarkable that I can't afford to not go through this valuable information whenever I surf the internet! ikea antilope
ReplyDelete